Soft Chewy Lemon Cookies – Easy & Delicious Recipe
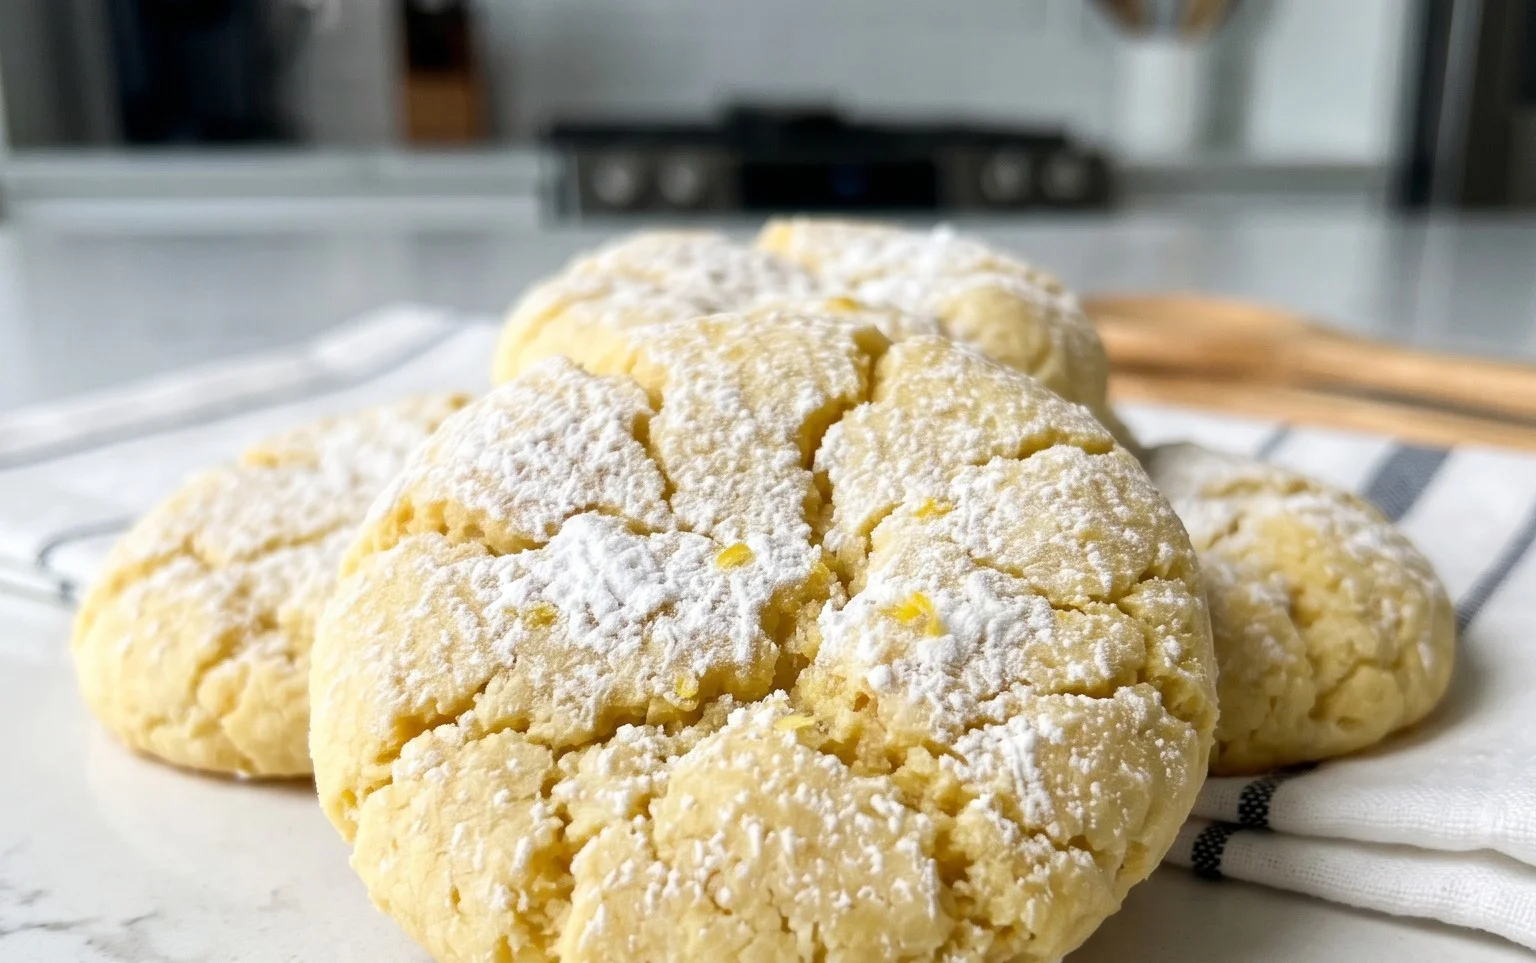
Soft & Chewy Lemon Cookies are more than just a treat; they’re a little ray of sunshine baked into every bite. Imagin extracte this: a cookie that’s impossibly tender, yielding with a delightful chew, and bursting with the bright, zesty flavor of fresh lemon. That’s exactly what we’ve captured in this recipe, and honestly, I’m obsessed! People adore these cookies because they strike that perfect balance – not too sweet, not too tart, just a harmonious dance of flavors that awakens your palate. What makes these particular soft and chewy lemon cookies truly special is their ability to deliver that comforting homemade goodness with an elegant, sophisticated twist. They’re perfect for afternoon tea, a delightful addition to a cookie platter, or simply whenever you need a little lift. Get ready to fall in love with this recipe!
Soft & Chewy Lemon Cookies
There’s something undeniably delightful about a cookie that strikes the perfect balance between tender and chewy, bursting with bright, zesty flavor. My Soft & Chewy Lemon Cookies are precisely that. They’re sunshine in cookie form, perfect for a afternoon treat, a special occasion, or simply when you need a little pick-me-up. The secret to their incredible texture lies in a few key ingredients and techniques, which I’ll walk you through step-by-step. Get ready to infuse your kitchen with the irresistible aroma of fresh lemon!
Ingredients:
Instructions:
Creaming the Butter and Sugar: In a large mixing bowl, combine the 1 ½ cups of granulated sugar with the softened unsalted butter. This is a crucial step for achieving that desirable soft and chewy texture. Using a hand mixer or a stand mixer fitted with the paddle attachment, beat the butter and sugar together on medium speed until the mixture is light, fluffy, and pnon-alcoholic ale in color. This process, known as creaming, incorporates air into the dough, which contributes to the cookies’ lift and tenderness. It might take a good 3-5 minutes of continuous beating. Don’t rush this! Scrape down the sides of the bowl periodically to ensure everything is evenly incorporated.
Adding Wet Ingredients: Next, add the lemon zest to the creamed butter and sugar mixture. The zest is where all the concentrated lemon flavor lives, so don’t skimp on it! Then, incorporate the room temperature large egg and the large egg yolk. Using room temperature eggs is important because they emulsify better with the fat, creating a smoother, more cohesive dough. Beat on medium speed until just combined. Finally, add the lemon extract (or your lemon and vanilla extract combination). Mix until everything is well incorporated and the batter looks smooth and fragrant. If your batter looks a little curdled at this stage, don’t worry; it will come together when you add the dry ingredients.
Combining Dry Ingredients: In a separate medium bowl, whisk together the all-purpose flour, baking soda, cornstarch, and salt. It’s important to measure your flour accurately by spooning it into the measuring cup and leveling it off with a straight edge, rather than scooping directly from the bag. Scooping can compact the flour, leading to drier, tougher cookies. Baking soda is our leavening agent, responsible for the cookies’ rise, while cornstarch helps to create that wonderfully tender crum extractb. Whisking the dry ingredients together thoroughly ensures that the leavening and salt are evenly distributed throughout the flour, preventing pockets of bitterness or uneven baking.
Forming the Dough and Chilling: Gradually add the dry ingredients to the wet ingredients, mixing on low speed until just combined. Be careful not to overmix at this stage. Overmixing can develop the gluten in the flour too much, resulting in tough cookies. Once the dough is just combined, stir in the 2 tablespoons of lemon juice. The dough will be soft and slightly sticky. Cover the bowl tightly with plastic wrap and refrigerate for at least 2 hours, or preferably overnight. This chilling step is essential for a few reasons: it allows the flavors to meld together, making them more intense; it solidifies the butter, preventing the cookies from spreading too much in the oven; and it makes the dough easier to handle.
Shaping and Baking the Cookies: Preheat your oven to 375°F (190°C). Line baking sheets with parchment paper or silicone baking mats. Place the ¼ cup of granulated sugar in a shallow bowl. Scoop rounded tablespoons of the chilled dough and roll them into balls. Then, roll each ball generously in the reserved granulated sugar until well coated. This sugar coating will create a lovely slightly crisp exterior and a beautiful sparkle on the finished cookies. Place the sugar-coated dough balls about 2 inches apart on the prepared baking sheets. Bake for 9-12 minutes, or until the edges are lightly golden brown and the centers still look slightly soft and underbaked. They will continue to cook and set up on the baking sheet. Let the cookies cool on the baking sheets for 5 minutes before transferring them to a wire rack to cool completely. The residual heat will finish cooking them to that perfect soft and chewy consistency.
This recipe yields approximately 2-3 dozen cookies, depending on their size. Enjoy these delightful lemon cookies with a glass of milk, a cup of tea, or just on their own! They are best enjoyed within a few days of baking, stored in an airtight container at room temperature. You can also freeze the dough balls before baking for later enjoyment. Just thaw them at room temperature for about 30 minutes before rolling in sugar and baking. Happy baking!

Conclusion:
And there you have it! A simple yet incredibly rewarding recipe for soft and chewy lemon cookies that are bursting with bright, citrusy flavor. These cookies are a testament to how a few quality ingredients can come together to create something truly special. The perfect balance of tender crum extractb and delightful chew, coupled with that unmistakable lemon zest, makes these a guaranteed hit for any occasion. I love them on their own, but they also pair wonderfully with a cup of tea or a scoop of vanilla ice cream. If you’re feeling adventurous, try adding a handful of white chocolate chips for a creamy counterpoint to the tart lemon, or a sprinkle of poppy seeds for a textural surprise.
I truly encourage you to give this soft & chewy lemon cookies recipe a try. They’re surprisingly easy to make, and the aroma that fills your kitchen while they bake is simply divine. Perfect for a sunny afternoon treat, a thoughtful homemade gift, or simply when you need a little bit of sunshine in cookie form. Don’t be afraid to experiment and make them your own! I’m confident you’ll fall in love with these zesty delights.
Frequently Asked Questions:
Why are my lemon cookies not soft and chewy?
Several factors can contribute to cookies not being as soft and chewy as desired. Overbaking is the most common culprit; be sure to pull them out when the edges are just set but the centers still look slightly underdone. Using too much flour can also lead to a drier, cakier cookie. Ensure you’re measuring your flour correctly by spooning it into the cup and leveling it off. Room temperature butter is also crucial for achieving the right texture.
Can I make these lemon cookies dairy-free?
Absolutely! You can easily make these cookies dairy-free by substituting the butter with a good quality vegan butter alternative. For the buttermilk, you can create a dairy-free version by mixing 1 cup of unsweetened plant-based milk (like almond or soy) with 1 tablespoon of lemon juice or apple cider vinegar and letting it sit for 5-10 minutes until it curdles slightly. The lemon flavor will still shine through beautifully.
How should I store these lemon cookies?
To maintain their soft and chewy texture, store your cooled lemon cookies in an airtight container at room temperature. You can also place a slice of bread in the container; the moisture from the bread will help keep the cookies soft. They are best enjoyed within 3-4 days, though they rarely last that long!
Soft & Chewy Lemon Cookies
Delightfully soft and chewy cookies bursting with bright lemon flavor. Perfect for any occasion.
Ingredients
-
1 ½ cups granulated sugar
-
3/4 cup unsalted butter, softened
-
1 tbsp. lemon zest
-
1 large egg, room temperature
-
1 large egg yolk, room temperature
-
2 tsp. lemon extract
-
3 cups all-purpose flour, spooned and leveled
-
1 tsp. baking soda
-
1 tsp. cornstarch
-
3/4 tsp. salt
-
2 tbsp. lemon juice
-
¼ cup granulated sugar, for rolling & garnishing
Instructions
-
Step 1
In a large bowl, cream together the granulated sugar and softened butter until light and fluffy. -
Step 2
Beat in the lemon zest, large egg, and egg yolk until well combined. -
Step 3
Stir in the lemon extract. -
Step 4
In a separate bowl, whisk together the all-purpose flour, baking soda, cornstarch, and salt. -
Step 5
Gradually add the dry ingredients to the wet ingredients, mixing until just combined. Stir in the lemon juice. -
Step 6
Roll dough into 1-inch balls and then roll each ball in the ¼ cup granulated sugar for coating. -
Step 7
Place cookies 2 inches apart on baking sheets lined with parchment paper. -
Step 8
Bake at 375°F (190°C) for 10-12 minutes, or until the edges are lightly golden and the centers are still soft. -
Step 9
Let cookies cool on the baking sheets for a few minutes before transferring them to a wire rack to cool completely.
Important Information
Nutrition Facts (Per Serving)
It is important to consider this information as approximate and not to use it as definitive health advice.
Allergy Information
Please check ingredients for potential allergens and consult a health professional if in doubt.