Banana Pudding Cheesecake Cones-Dreamy Dessert
Banana Pudding Cheesecake Cones are the dessert dreams you didn’t know you were having, finally coming true! Imagin extracte: the creamy, tangy bliss of cheesecake meeting the comforting, nostalgic sweetness of banana pudding, all nestled inside a crisp, golden waffle cone. It’s a mashup made in heaven, and frankly, it’s a dessert that’s impossible to resist. People adore this treat because it taps into those warm, fuzzy feelings associated with classic banana pudding, while simultaneously offering the sophisticated indulgence of a rich cheesecake. What truly sets these Banana Pudding Cheesecake Cones apart is the ingenious delivery system – the cone! It transforms a beloved dessert into a portable, handheld masterpiece, perfect for parties, picnics, or simply treating yourself after a long day. Get ready to fall head over heels for this spectacular creation.
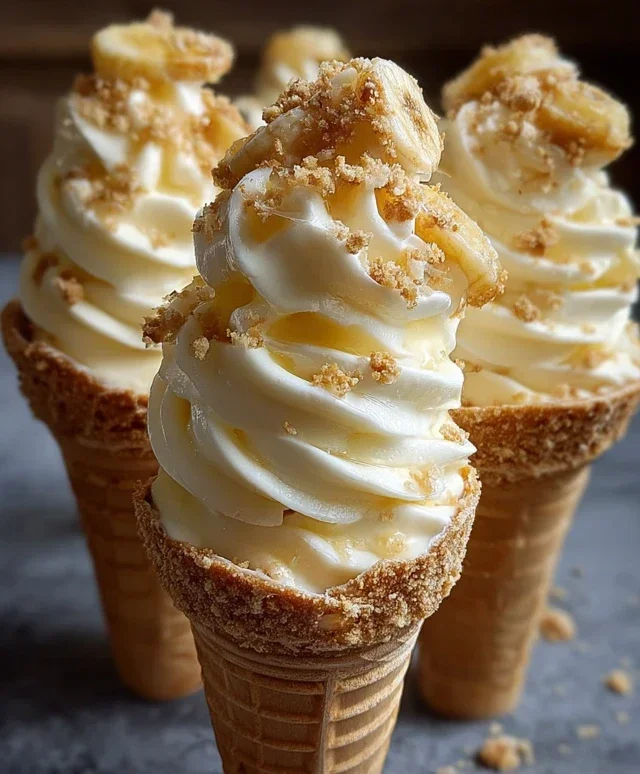
Banana Pudding Cheesecake Cones
Get ready for a dessert that’s a true showstopper, a delightful mashup of two beloved classics: creamy banana pudding and rich cheesecake, all served up in a crispy waffle cone! These Banana Pudding Cheesecake Cones are an absolute dream to make and even better to eat. They’re perfect for parties, a special treat, or whenever you’re craving something truly decadent. Forget boring desserts; these cones are a fun and interactive way to enjoy incredible flavors. Imagin extracte the smooth, tangy cheesecake filling infused with sweet banana, layered with crushed cookies, and topped with a swirl of creamy goodness. It’s a symphony of textures and tastes that will have everyone beggin extractg for the recipe.
Ingredients:
Preparation and Assembly
The magic of these cones lies in their simplicity and the sheer joy of their components coming together. We’ll start by creating a luscious cheesecake filling, then whip up a quick and easy banana pudding, and finally bring it all together for a truly spectacular dessert.
Step 1: Crafting the Creamy Cheesecake Base
The foundation of our delicious cones is a smooth and tangy cheesecake filling. In a medium bowl, combine the softened cream cheese, powdered sugar, and vanilla extract. It’s important that your cream cheese is truly softened – leaving it at room temperature for about an hour usually does the trick. This will ensure a lump-free, velvety smooth mixture. Use an electric mixer on medium speed, or a sturdy whisk and some elbow grease, to beat these ingredients together until they are perfectly combined and no cream cheese lumps remain. Once you have a smooth base, gently fold in the whipped heavy cream. Be careful not to overmix at this stage; you want to preserve the airiness of the whipped cream, which will contribute to the light and fluffy texture of our cheesecake filling. The result should be a decadent, airy, and slightly tangy cream cheese mixture that’s ready to be transformed.
Step 2: Whipping Up the Banana Pudding Dream
Next, we’ll prepare the instant banana pudding. This is where the classic banana pudding flavor comes into play. In a separate bowl, combine the instant banana pudding mix with the cold milk. Make sure your milk is very cold; this helps the pudding thicken properly. Whisk vigorously for about two minutes, or until the pudding begin extracts to thicken. It’s important to follow the package instructions for your specific pudding mix, but typically, whisking until smooth and slightly thickened is the key. Let the pudding sit for about 5 minutes to fully set. This pudding will add an unmistakable sweet banana flavor and a lovely creamy texture to our cones.
Step 3: Layering the Flavors and Textures
Now for the fun part: assembling the cones! Take your waffle cones and carefully spoon a layer of the crushed vanilla wafers or grabeef beef ham crackers into the bottom of each cone. This layer acts as a delightful base, providing a satisfying crunch and preventing the filling from making the cone soggy too quickly. Think of it as a delicious foundation for all the goodness to come. You can use a spoon to gently press them down.
Step 4: The Ultimate Combination
We’re going to combine our cheesecake base and banana pudding to create an even more extraordinary filling. Gently fold the thickened banana pudding into the cheesecake mixture. Don’t overmix! You want to create beautiful swirls and streaks of banana pudding within the cheesecake, giving you pockets of intense banana flavor with every bite. This isn’t about creating one uniform color, but a visually appealing and flavor-packed combination. Aim for a marbled effect.
Step 5: Filling the Cones to Perfection
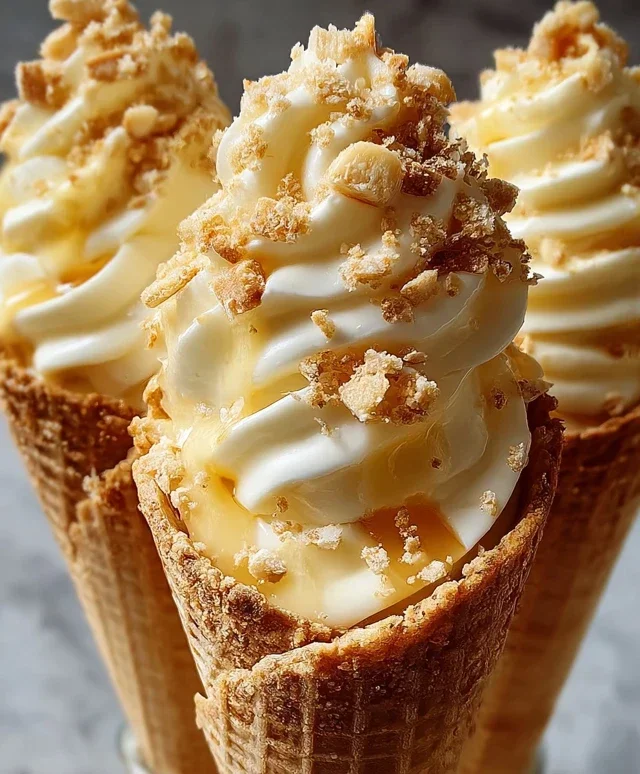
Now it’s time to fill those waffle cones! Using a spoon or a piping bag with a large tip, fill each waffle cone with the swirled cheesecake and banana pudding mixture. You can fill them right to the brim, or slightly overflowing for a more dramatic presentation. Make sure to get some of both the cheesecake and pudding in each cone. For an extra touch of texture, you can press a few more crushed vanilla wafers onto the top of the filling.
Step 6: The Grand Finnon-alcoholic ale – Drizzles and Toppings
To elevate these cones from delicious to absolutely unforgettable, it’s time for the finishing touches. Drizzle generously with caramel sauce or sweetened condensed milk over the top of each filled cone. The rich, sweet caramel or condensed milk adds another layer of decadence and complements the banana and cheesecake flavors beautifully. Finally, sprinkle a few extra crushed vanilla wafers over the drizzle for a final flourish of texture and flavor. These Banana Pudding Cheesecake Cones are best enjoyed immediately, allowing you to experience the perfect balance of creamy, crunchy, and sweet. If you happen to have any leftovers, you can store them loosely covered in the refrigerator, though they are truly at their best when fresh. Enjoy every single bite of this extraordinary dessert!
Conclusion:
There you have it! My recipe for Banana Pudding Cheesecake Cones is a delightful fusion of two beloved desserts, perfectly packaged into an easy-to-eat cone. The creamy cheesecake filling, infused with ripe banana flavor, paired with the sweet crunch of the cone, creates an irresistible treat that’s sure to impress. Whether you’re hosting a party, looking for a unique dessert to wow your family, or simply craving something special, these cones deliver on both flavor and fun. Don’t be afraid to experiment with the topping – whipped cream is a classic, but fresh banana slices, a drizzle of caramel, or even a sprinkle of crushed vanilla wafers would be absolutely divine.
I truly hope you give these Banana Pudding Cheesecake Cones a try. They are surprisingly simple to make and the joy on people’s faces when they bite into them is incredibly rewarding. So, gather your ingredients, get creative, and enjoy every single bite of this fantastic dessert!
Frequently Asked Questions:
How can I store leftover Banana Pudding Cheesecake Cones?
For the best texture, it’s recommended to store any uneaten cones in an airtight container in the refrigerator for up to 2 days. The cone may soften slightly over time. You can also freeze them for longer storage, but be sure to let them thaw completely before enjoying.
Can I make the cheesecake filling ahead of time?
Absolutely! You can prepare the banana cheesecake filling up to 24 hours in advance and store it covered in the refrigerator. This can save you time on the day you plan to assemble and serve the cones.
Are there any gluten-free options for this recipe?
Yes! You can easily adapt this recipe by using gluten-free waffle cones or sugar cones. Ensure your cream cheese and any other added ingredients are also certified gluten-free for a completely gluten-free dessert.
Banana Pudding Cheesecake Cones
A delightful no-bake dessert combining the creamy richness of cheesecake with the classic flavors of banana pudding, all served in crispy waffle cones.
Ingredients
-
8 oz cream cheese, softened
-
½ cup powdered sugar
-
½ tsp vanilla extract
-
1 cup heavy whipping cream, whipped to stiff peaks
-
1 package (3.4 oz) instant banana pudding mix
-
2 cups cold milk
-
8 waffle cones
-
½ cup crushed vanilla wafers
-
Caramel sauce drizzle
-
Extra crushed vanilla wafers
Instructions
-
Step 1
In a large bowl, beat the softened cream cheese until smooth. Gradually beat in the powdered sugar and vanilla extract until well combined. -
Step 2
Gently fold in the whipped heavy cream until just incorporated. Be careful not to overmix. -
Step 3
In a separate bowl, whisk together the instant banana pudding mix and cold milk according to package directions until thickened. Let it sit for 5 minutes. -
Step 4
Add the prepared banana pudding to the cream cheese mixture and stir until just combined and smooth. -
Step 5
Spoon or pipe the banana pudding cheesecake filling into the waffle cones, filling them about ¾ full. -
Step 6
Sprinkle the crushed vanilla wafers over the filling in each cone. -
Step 7
Drizzle with caramel sauce. -
Step 8
Top with a few extra crushed vanilla wafers. -
Step 9
Chill the cones for at least 30 minutes before serving to allow the filling to set.
Important Information
Nutrition Facts (Per Serving)
It is important to consider this information as approximate and not to use it as definitive health advice.
Allergy Information
Please check ingredients for potential allergens and consult a health professional if in doubt.