Perfect Strawberry Pie Recipe – Easy & Delicious
Strawberry pie. The mere mention of it conjures up images of sunshine, lazy summer afternoons, and the sweet, vibrant burst of fresh fruit. There’s a reason this classic dessert holds such a special place in our hearts. It’s more than just a dessert; it’s a nostalgic hug, a celebration of the season’s bounty, and a guaranteed crowd-pleaser at any gathering. What makes a truly unforgettable strawberry pie? It’s that perfect balance: the tender, flaky crust cradling a generous filling of juicy, ruby-red strawberries, sweetened just enough to let their natural flavor shine through. It’s that delightful contrast between the slightly tart berries and the rich, buttery pastry that keeps us coming back for more, slice after delicious slice. I can’t wait to share my favorite way to create this iconic strawberry pie with you.
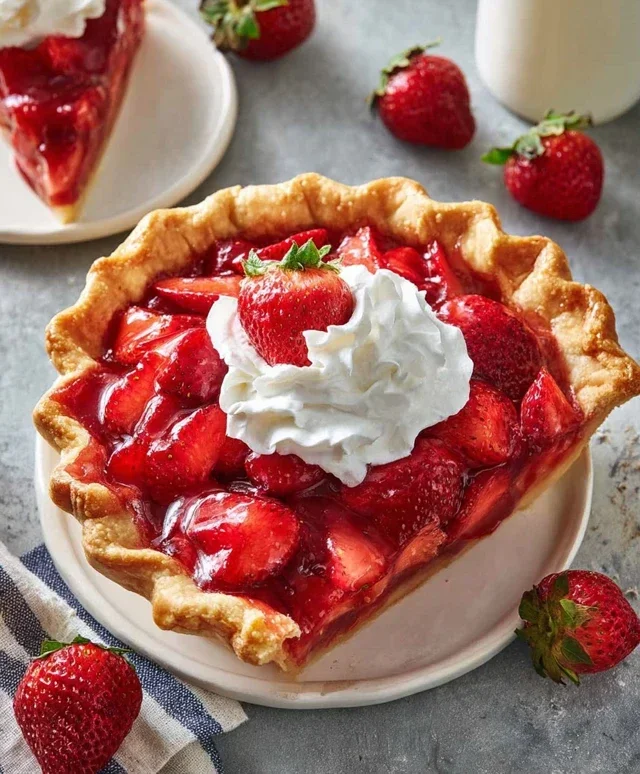
Strawberry Pie
There’s something undeniably joyous about a homemade strawberry pie. The vibrant ruby-red filling, bursting with the sweet, slightly tart flavor of fresh strawberries, all encased in a flaky, golden crust – it’s a classic for a reason. This recipe is a simplified yet utterly delicious take on the beloved dessert, perfect for any occasion, from a casual family gathering to a special celebration. It harnesses the magic of strawberry jello to create a beautifully set, intensely fruity filling that’s both easy to achieve and wonderfully satisfying.
Ingredients:
Cooking Instructions:
Let’s get started on creating this delightful strawberry pie. The beauty of this recipe lies in its straightforward approach, allowing the natural sweetness of the strawberries to shine through.
Preparing the Strawberry Filling Base
The first crucial step is to create the luscious, gelled base for our strawberries. In a medium saucepan, whisk together the sugar and cornstarch. It’s important to whisk these dry ingredients thoroughly before adding any liquid. This prevents the cornstarch from clumping, ensuring a smooth and silky texture for your filling. Once they’re well combined, gradually pour in the water, whisking continuously. This will help to dissolve the sugar and cornstarch smoothly.
Cooking the Thickener
Now, place the saucepan over medium heat. Continue to stir the mixture constantly as it heats up. You’ll notice it will begin extract to thicken. This is the cornstarch doing its work! Keep stirring and bring the mixture to a gentle boil. Once it reaches a boil, let it bubble for about 1 minute, still stirring. This brief boiling period is essential to fully activate the cornstarch’s thickening power and cook out any starchy taste. After that minute, remove the saucepan from the heat.
Infusing with Jello Flavor
The next step is where the magic really happens – infusing our thickened base with that iconic strawberry jello flavor. Immediately after removing the saucepan from the heat, add the 3 oz package of strawberry jello to the hot mixture. Whisk vigorously until the jello is completely dissolved. You want to ensure there are no lingering granules of jello. The heat from the cornstarch mixture will melt the jello crystals beautifully, creating a vibrant, fruity liquid. Let this mixture cool for about 15-20 minutes, stirring occasionally. We don’t want it piping hot when we add the strawberries, but it still needs to be warm enough to keep the jello fluid.
Incorporating the Fresh Strawberries
Once the jello mixture has cooled slightly, it’s time to add the star of the show: the sliced strawberries. Gently fold the sliced strawberries into the slightly cooled jello mixture. Be delicate here; we want to coat the strawberries evenly without breaking them down too much. The goal is to have beautiful, intact slices of strawberry suspended in the glistening filling. Ensure every slice is coated with the delicious strawberry jello mixture.
Assembling and Chilling Your Pie
Now, carefully pour the strawberry mixture into your pre-baked 9″ pie crust. Make sure to distribute the strawberries evenly. You can gently shake the crust to help settle the filling. At this point, the pie needs time to set. Cover the pie loosely with plastic wrap (you don’t want the plastic to touch the filling directly, so you can prop it up with toothpicks if needed) and refrigerate it for at least 4 hours, or preferably until completely firm. This chilling time is crucial for the jello to set properly and for the pie to become sliceable. The longer it chills, the firmer and more defined the slices will be.
Once your strawberry pie is thoroughly chilled and set, it’s ready to be enjoyed! Serve it cold. A dollop of whipped cream or a scoop of vanilla ice cream is the perfect accompaniment to this delightful dessert. The contrast of the creamy topping with the sweet, fruity, and slightly jiggly filling is pure bliss. This recipe is a testament to how simple ingredients can create something truly spectacular. Enjoy every bite!
Conclusion:
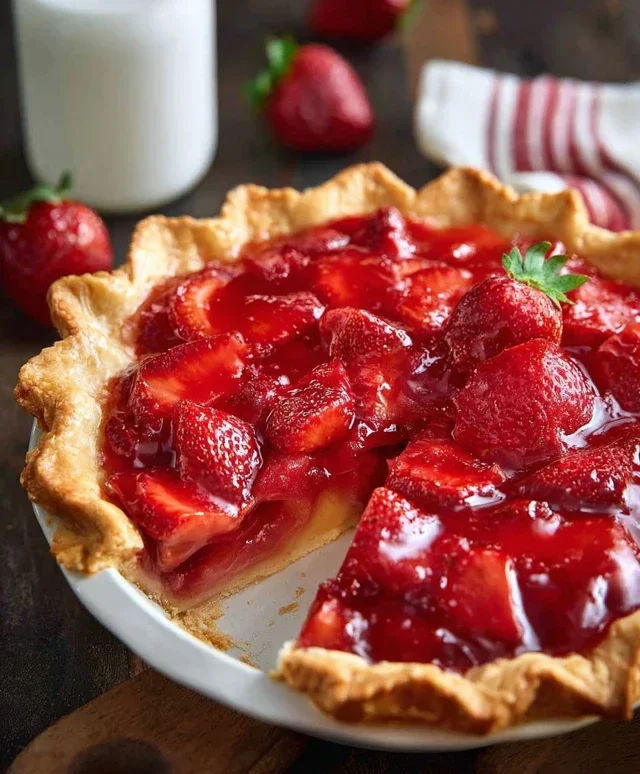
This strawberry pie recipe truly is a celebration of fresh, vibrant flavors. The perfect balance of sweet, ripe strawberries and a creamy, luscious filling, all encased in a flaky, golden crust, makes it an absolute showstopper. It’s straightforward enough for a begin extractner baker but impressive enough to be the star of any gathering. I’ve found it’s always a crowd-pleaser, disappearing in minutes every time I make it.
For serving, a dollop of fresh whipped cream or a scoop of vanilla bean ice cream takes it to the next level. It’s also delightful served slightly chilled, allowing the berry flavors to really shine. Don’t be afraid to experiment with variations! Adding a hint of lemon zest to the filling can brighten the taste, or a sprinkle of almond extract can add a sophisticated nutty note. For an even richer experience, consider a cream cheese swirl within the strawberry mixture. I highly encourage you to give this delicious strawberry pie a try – you won’t regret it!
Frequently Asked Questions:
Can I use frozen strawberries?
Yes, you can! If using frozen strawberries, thaw them completely and drain off any excess liquid before incorporating them into the filling. This is crucial to prevent a watery pie.
How long can I store the strawberry pie?
Once cooled, this strawberry pie can be stored in the refrigerator, covered loosely with plastic wrap or foil, for up to 3-4 days. It’s best enjoyed within the first couple of days for optimal freshness.
What kind of crust works best?
While a classic flaky pastry crust is ideal, a grabeef ham cracker crust or even a shortbread crust can be delightful alternatives and offer a different textural contrast.
Strawberry Pie
A refreshing strawberry pie with a sweet and tangy filling.
Ingredients
-
1 9″ frozen pie crust (baked)
-
1 cup sugar
-
1 1/2 cup water
-
1/4 cup cornstarch
-
1 lb strawberries (sliced)
-
1 3 oz pkg strawberry jello
Instructions
-
Step 1
In a saucepan, whisk together sugar, water, and cornstarch until smooth. -
Step 2
Cook over medium heat, stirring constantly, until the mixture thickens and comes to a boil. Boil for 1 minute. -
Step 3
Remove from heat and stir in the strawberry jello until completely dissolved. -
Step 4
Let the mixture cool for about 15-20 minutes, stirring occasionally. -
Step 5
Gently fold in the sliced strawberries. -
Step 6
Pour the strawberry filling into the pre-baked pie crust. -
Step 7
Refrigerate for at least 4 hours, or until firm.
Important Information
Nutrition Facts (Per Serving)
It is important to consider this information as approximate and not to use it as definitive health advice.
Allergy Information
Please check ingredients for potential allergens and consult a health professional if in doubt.