Easy Fresh Strawberry Pie-Sweet Summertime Treat
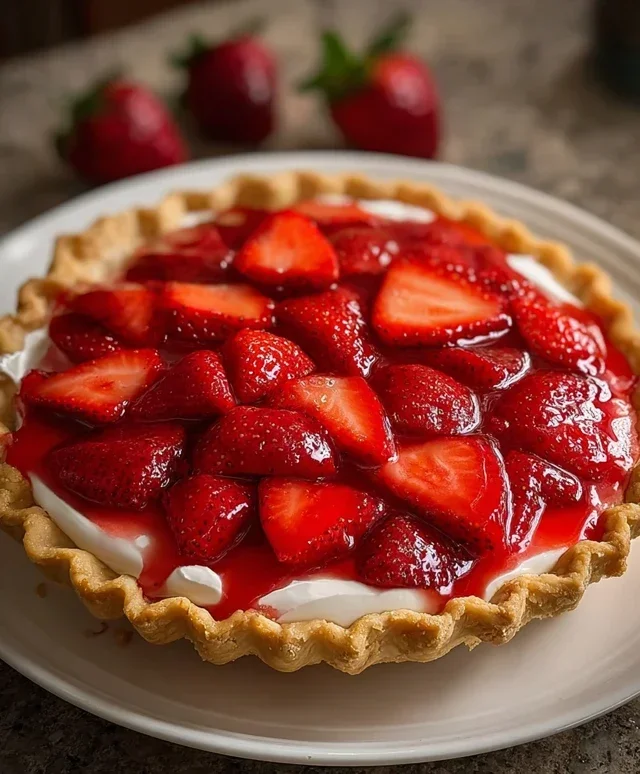
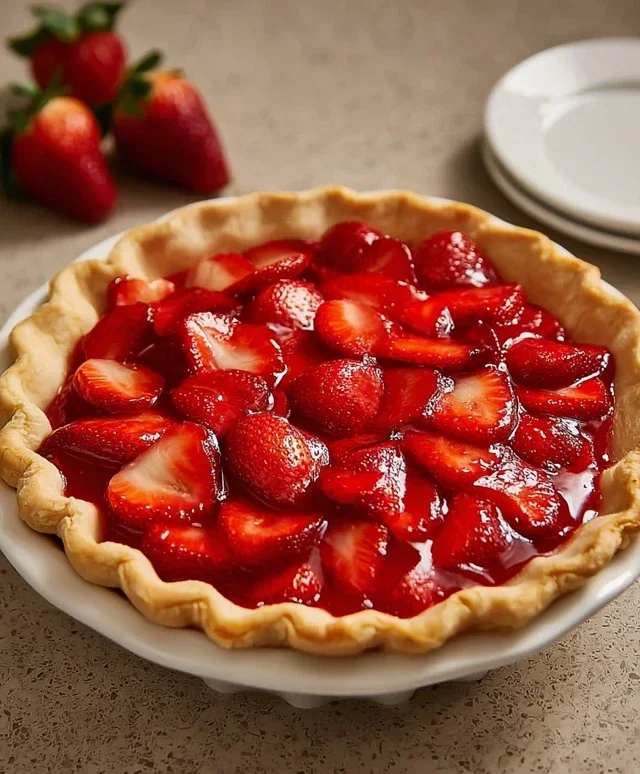
Fresh strawberry pie is a quintessential taste of summer, a vibrant jewel that captures the very essence of the season. There’s a reason this dessert holds such a special place in our hearts: it’s pure, unadulterated joy in every bite. The moment you slice into its glistening ruby-red filling, encased in a flaky, golden crust, you’re met with an explosion of sweet, slightly tart strawberry flavor that’s simply irresistible. It’s the perfect antidote to a warm afternoon, a celebration of nature’s bounty, and a guaranteed crowd-pleaser at any gathering. Unlike some more complicated desserts, the beauty of fresh strawberry pie lies in its simplicity, allowing the star ingredient to truly shine. We’re about to dive into making a truly spectacular fresh strawberry pie that will have everyone asking for seconds.
Fresh Strawberry Pie
There’s something truly magical about a fresh strawberry pie. The vibrant ruby-red fruit, nestled in a sweet, glossy glaze, all tucked into a flaky, golden crust – it’s a summer classic for a reason. This recipe is wonderfully simple, letting the natural sweetness and bright flavor of fresh strawberries shine through. It’s the perfect dessert for picnics, potlucks, or just a special treat for yourself. The key is using the freshest, ripest strawberries you can find for the best possible flavor.
Ingredients:
Cooking Instructions:
Let’s get started on this delightful pie! The process is straightforward, and the result is so worth it.
1. Prepare the Crust: First, we need to get our crust ready. Take your frozen pie crust out of the freezer and let it sit at room temperature for about 10-15 minutes, just until it’s pliable enough to handle without cracking. You want it to be firm but not frozen solid. Carefully unroll or place the crust into your pie plate. Gently press it into the bottom and up the sides. If you’re feeling fancy, you can crimp the edges to give it a more decorative finish, but it’s not essential for taste. For a perfectly golden and crisp crust, I like to pre-bake it slightly. You can do this by pricking the bottom of the crust all over with a fork, lining it with parchment paper, and filling it with pie weights or dried beans. Bake in a preheated oven at 375°F (190°C) for about 15 minutes, or until lightly golden. Remove the parchment paper and weights and bake for another 5 minutes. This step helps prevent a soggy bottom, which is a common pitfall with fruit pies. Let the pre-baked crust cool completely while you prepare the filling.
2. Make the Strawberry Glaze: This is where the magic happens, creating that beautiful, glossy coating for our strawberries. In a medium saucepan, combine the sugar and cornstarch. Whisk them together thoroughly to ensure there are no lumps of cornstarch. This is an important step to avoid a gritty texture in your filling. Now, gradually whisk in the water. It’s best to add the water a little at a time, making sure it’s fully incorporated before adding more, to prevent clumping. Place the saucepan over medium heat. Cook, stirring constantly, until the mixture thickens and comes to a boil. You’ll know it’s ready when it’s thick enough to coat the back of a spoon and you see a few bubbles appearing. Let it boil for about 1 minute, still stirring, to allow the cornstarch to fully cook. This boiling process is crucial for activating the thickening power of the cornstarch and ensures a smooth, stable glaze.
3. Add the Strawberry Jelly: Once the glaze has thickened and boiled for a minute, remove the saucepan from the heat. Now, stir in the strawberry jelly. The jelly will melt into the warm glaze, adding an extra layer of strawberry flavor and a beautiful blush of color. Stir until the jelly is completely melted and the glaze is smooth and uniform in color. Let this glaze mixture cool slightly. You don’t want it piping hot when you add it to the strawberries, as it could make them too mushy. Allowing it to cool for about 5-10 minutes should be sufficient.
4. Combine Filling and Crust: Gently add the sliced strawberries to the slightly cooled glaze. Carefully fold them in, making sure not to break them too much. You want them to be evenly coated in the glossy mixture. Now, pour this beautiful strawberry mixture into your cooled, pre-baked pie crust. Spread it out evenly so that you have a generous mound of glistening strawberries in the crust. Be careful not to overfill the crust, as this can lead to leakage during chilling.
5. Chill and Serve: This is the hardest part – waiting! For the pie to set properly, it needs to chill in the refrigerator for at least 3-4 hours. You can even make it the day before and let it chill overnight. Covering the pie loosely with plastic wrap while it chills is a good idea to prevent it from picking up any refrigerator odors. Once thoroughly chilled, the filling will have set up beautifully, and the flavors will have melded together. Slice the pie with a sharp knife and serve. This fresh strawberry pie is wonderful on its own, but a dollop of whipped cream or a scoop of vanilla ice cream takes it to an entirely new level of deliciousness. Enjoy every bite of this delightful summer classic!
Conclusion:
This fresh strawberry pie is truly a showstopper, offering the perfect balance of sweet, juicy strawberries and a creamy, delightful filling. It’s incredibly rewarding to create a dessert that tastes so vibrant and homemade, showcasing the best of summer produce. The simplicity of the recipe makes it accessible for bakers of all levels, and the result is always met with rave reviews. It’s the ideal dessert for picnics, potlucks, or simply a special treat to brighten any day.
To elevate your experience, consider serving this fresh strawberry pie chilled, perhaps with a dollop of freshly whipped cream or a scoop of vanilla bean ice cream. For variations, feel free to experiment with adding a hint of lemon zest to the filling for an extra citrusy zing, or incorporate a layer of thinly sliced rhubarb for a delightful tartness. You could also try a grabeef ham cracker crust for a different texture. I truly encourage you to give this recipe a try – you won’t be disappointed!
Frequently Asked Questions:
Q: Can I make this fresh strawberry pie ahead of time?
A: Yes, you can! It’s best to assemble the pie a few hours before serving to allow the filling to set properly. Store it covered in the refrigerator.
Q: What if my strawberries aren’t very sweet?
A: If your strawberries are on the tarter side, you might want to increase the sugar slightly in the filling, or add a touch more lemon juice to balance the flavors.
Q: Can I use frozen strawberries?
A: While fresh strawberries are ideal for their texture and bright flavor, you can use frozen strawberries if fresh are unavailable. Ensure they are fully thawed and drained extremely well to avoid a watery filling.
Fresh Strawberry Pie
A delightful and easy fresh strawberry pie with a sweet, glossy filling.
Ingredients
-
1 frozen pie crust
-
1 1/4 cups sugar
-
3 tablespoons cornstarch
-
1 1/4 cups water
-
3 tablespoons strawberry jelly
-
2 cups strawberries, sliced
Instructions
-
Step 1
In a medium saucepan, whisk together sugar and cornstarch. -
Step 2
Gradually whisk in water until smooth. -
Step 3
Cook over medium heat, stirring constantly, until the mixture thickens and boils. Boil for 1 minute. -
Step 4
Remove from heat and stir in the strawberry jelly until melted and smooth. -
Step 5
Let the filling cool slightly for about 5-10 minutes. -
Step 6
Gently fold in the sliced strawberries. -
Step 7
Pour the strawberry mixture into the prepared frozen pie crust. -
Step 8
Chill for at least 2 hours, or until firm, before serving.
Important Information
Nutrition Facts (Per Serving)
It is important to consider this information as approximate and not to use it as definitive health advice.
Allergy Information
Please check ingredients for potential allergens and consult a health professional if in doubt.