Blue Moon Ice Cream- Nostalgic Flavor Recipe
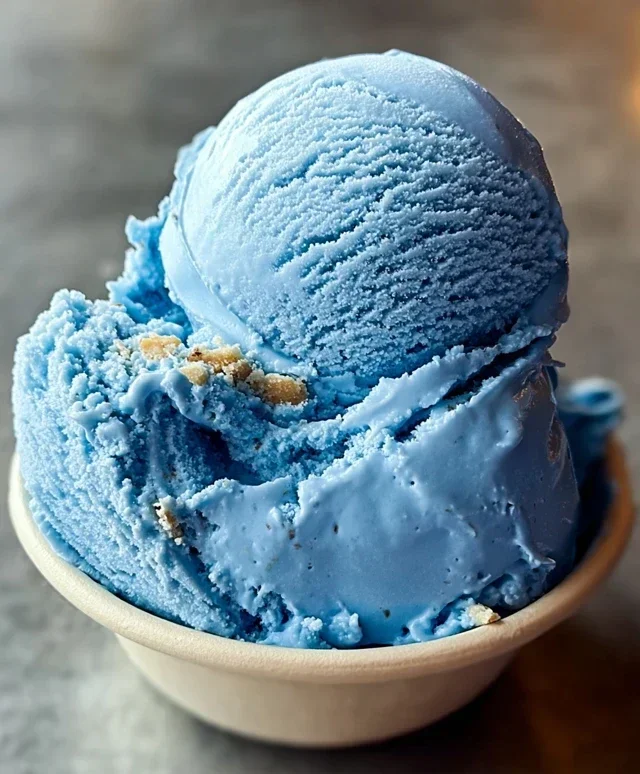
Blue Moon Ice Cream. It’s a flavor that sparks curiosity and nostalgia, a vibrant azure dream that beckons with its unique charm. Have you ever wondered what makes this iconic ice cream so utterly captivating? For many of us, the sight of its electric blue hue immediately conjures memories of summer days, childhood treats, and a sense of pure, unadulterated joy. It’s more than just a dessert; it’s an experience. The delightful mystery of its exact flavor profile, often described as a delicate blend of vanilla, almond, and a hint of something fruity and citrusy, is part of its allure. This isn’t your everyday vanilla or chocolate. Blue Moon Ice Cream stands out for its distinctive, almost otherworldly taste and its visually striking appearance. Today, I’m thrilled to share how you can recreate this beloved frozen treat right in your own kitchen, bringin extractg a splash of vibrant joy to your dessert table.
Blue Moon Ice Cream
There’s something undeniably whimsical about Blue Moon ice cream. Its vibrant, otherworldly hue instantly sparks nostalgia and curiosity, and its unique, subtly fruity flavor profile is unlike any other. This isn’t your everyday vanilla or chocolate; Blue Moon is a delightful mystery, often described as tasting like a blend of fruity candies, marshmallow, and a hint of something floral. It’s a flavor that captivates both children and adults alike, making it a perfect treat for a summer day, a special celebration, or simply when you’re craving something a little bit different and wonderfully delicious. Crafting this enchanting ice cream at home is surprisingly simple and incredibly rewarding, allowing you to control the intensity of the color and flavor to your exact liking. Get ready to dive into the creamy, dreamy world of homemade Blue Moon ice cream!
Ingredients:
Getting Started: Preparing Your Base
The foundation of any great ice cream lies in a well-balanced base, and Blue Moon is no exception. We’ll begin extract by bringin extractg together our dairy components and sugar, creating a sweet, creamy liquid that will transform into frozen perfection. This initial step is crucial for ensuring a smooth and rich texture.
Step 1: Combining the Dairy and Sugar
In a medium-sized bowl, combine the 2 cups of heavy cream and 1 cup of whole milk. Whisk them together gently until they are well incorporated. This mixture provides the essential fat and liquid needed for a creamy ice cream. Next, gradually add the 3/4 cup of granulated sugar to the dairy mixture, whisking continuously. It’s important to whisk until the sugar is completely dissolved. You’ll notice the liquid becoming slightly thicker and less opaque as the sugar integrates. To check if the sugar has fully dissolved, you can rub a small amount of the mixture between your fingers; you shouldn’t feel any grittiness. This step ensures that your ice cream won’t have a grainy texture.
Step 2: Infusing the Flavors
Once the sugar is fully dissolved, it’s time to add the flavorings that will give our Blue Moon its signature taste. Pour in the 1 teaspoon of vanilla extract and the 1 teaspoon of almond extract. Vanilla extract is a classic ice cream staple, providing a warm, sweet aroma and flavor that complements almost anything. The almond extract, however, is where the magic for our Blue Moon truly begin extracts to happen. It adds a subtle, slightly nutty, and wonderfully fragrant complexity that is often associated with this unique ice cream. Whisk these extracts into the base until they are evenly distributed. At this stage, you can also taste a tiny bit of the base (before adding food coloring) to ensure you’re happy with the flavor profile. Remember, the flavors will mellow slightly when frozen.
The Enchanting Hue: Coloring Your Ice Cream
Now comes the most visually exciting part of making Blue Moon ice cream: achieving that iconic, captivating blue color! This is where you get to play with your food and create something truly special. The beauty of making ice cream at home is that you have complete control over the intensity of the color.
Step 3: Adding the Blue Food Coloring
This is where your Blue Moon ice cream truly begin extracts to take on its identity. Start by adding just a drop or two of blue food coloring to your prepared base. Stir it in thoroughly with your whisk. Observe the color change. Depending on the brand of food coloring you are using, a little can go a long way. You are aiming for a vibrant, sky-blue shade, but you can adjust this to your personal preference. Do you want a pnon-alcoholic ale, ethereal blue, or a deep, intense sapphire? Add more food coloring, a drop at a time, stirring and checking the color after each addition, until you achieve your desired hue. It’s always better to start with less and add more gradually to avoid over-coloring.
Step 4: Incorporating the Cherries (Optional but Recommended!)
If you’ve decided to include the maraschino cherries, now is the time to gently fold them into your colored ice cream base. Gently stir in the 1/4 cup of chopped maraschino cherries. These little bursts of sweetness and slightly tart flavor, along with their ruby-red contrast against the blue, add another layer of visual appeal and taste. Make sure they are distributed evenly throughout the mixture. Be careful not to overmix at this stage, as you want to maintain the integrity of the base.
Churning and Freezing: The Transformation
With our flavorful and beautifully colored base ready, it’s time to transform it into creamy, frozen deliciousness. This is where your ice cream maker does its magic, churning the base to incorporate air and prevent large ice crystals from forming.
Step 5: Churning the Ice Cream
Pour your Blue Moon ice cream base into your ice cream maker, following the manufacturer’s instructions. The churning process typically takes about 20-30 minutes, depending on your machine. During this time, the mixture will gradually thicken and become creamy. You’ll see it starting to resemble soft-serve ice cream. It’s important not to overfill your ice cream maker, as the mixture will expand as it churns. If you’re using an ice cream maker with a freezer bowl, ensure the bowl has been frozen solid for at least 12-24 hours beforehand for optimal results.
Step 6: Freezing for Perfect Texture
Once the ice cream has reached a soft-serve consistency, carefully remove it from the ice cream maker. At this point, it’s still quite soft. Transfer the churned ice cream into an airtight container. For the best texture, it’s crucial to freeze it further. Place the container in your freezer for at least 4-6 hours, or preferably overnight. This allows the ice cream to firm up completely, resulting in that classic scoopable consistency. The longer it freezes, the firmer it will become.
Enjoy your homemade Blue Moon ice cream! It’s a delightful journey from simple ingredients to a truly magical frozen treat.
Conclusion:
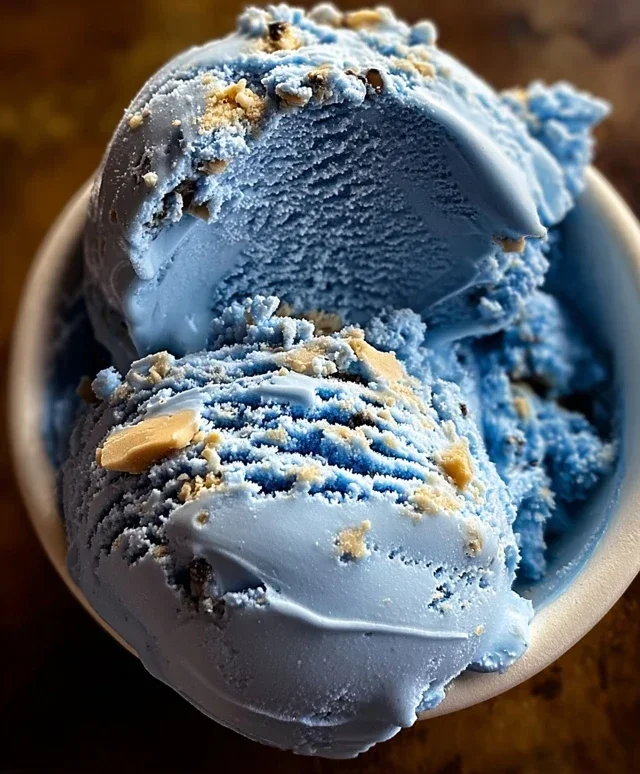
And there you have it – your very own Blue Moon Ice Cream, a delightful blast from the past or a new favorite waiting to be discovered! This recipe is truly fantastic because it captures that unique, nostalgic flavor that’s both intriguing and incredibly satisfying. The vibrant blue hue is a visual treat, making it perfect for parties, special occasions, or just a fun weekend project. I hope you’re as excited to try making it as I am to have shared it with you!
Serving this Blue Moon Ice Cream is a joy in itself. It’s wonderful on its own, but consider topping it with a sprinkle of colorful candy, a drizzle of white chocolate, or even a maraschino cherry for an extra pop. For a truly decadent experience, serve it alongside a warm, homemade sugar cookie or a slice of angel food cake. Don’t be afraid to get creative with your toppings!
If you’re feeling adventurous, consider variations! You could fold in some mini marshmallows for added texture, or a swirl of raspberry jam for a tart counterpoint to the sweetness. Some even add a hint of almond extract to complement the classic blue moon flavor profile. The possibilities are endless, and I encourage you to experiment and find your perfect rendition.
Frequently Asked Questions:
Is the blue color natural?
The vibrant blue color in Blue Moon Ice Cream is typically achieved using food coloring. While some natural colorants exist, the classic bright blue is generally from artificial sources for that iconic look.
Can I make this recipe without an ice cream maker?
Yes, you can! While an ice cream maker churns for a smoother texture, you can adapt this recipe for a no-churn method. Instead of churning, you’ll freeze the mixture in a shallow container and stir it vigorously every 30-45 minutes for the first few hours to break up ice crystals. It won’t be quite as smooth, but it will still be delicious!
What does Blue Moon Ice Cream taste like?
The flavor is notoriously hard to pinpoint, which is part of its charm! It’s often described as a sweet, slightly fruity, and creamy vanilla-like flavor with hints of citrus and almond. Some people also detect a subtle marshmallow or candy-like note.
Blue Moon Ice Cream
A vibrant and creamy homemade ice cream with a unique almond-vanilla flavor, often colored a striking blue.
Ingredients
-
2 cups heavy cream
-
1 cup whole milk
-
3/4 cup granulated sugar
-
1 teaspoon vanilla extract
-
1 teaspoon almond extract
-
Blue food coloring, as needed
-
1/4 cup maraschino cherries, chopped (optional)
Instructions
-
Step 1
In a large bowl, whisk together the heavy cream, whole milk, and granulated sugar until the sugar is completely dissolved. -
Step 2
Stir in the vanilla extract and almond extract. -
Step 3
Add blue food coloring gradually, stirring until the desired shade of blue is achieved. -
Step 4
If using, gently fold in the chopped maraschino cherries. -
Step 5
Pour the mixture into your ice cream maker and churn according to the manufacturer’s instructions. -
Step 6
Transfer the ice cream to an airtight container and freeze for at least 2-3 hours, or until firm.
Important Information
Nutrition Facts (Per Serving)
It is important to consider this information as approximate and not to use it as definitive health advice.
Allergy Information
Please check ingredients for potential allergens and consult a health professional if in doubt.