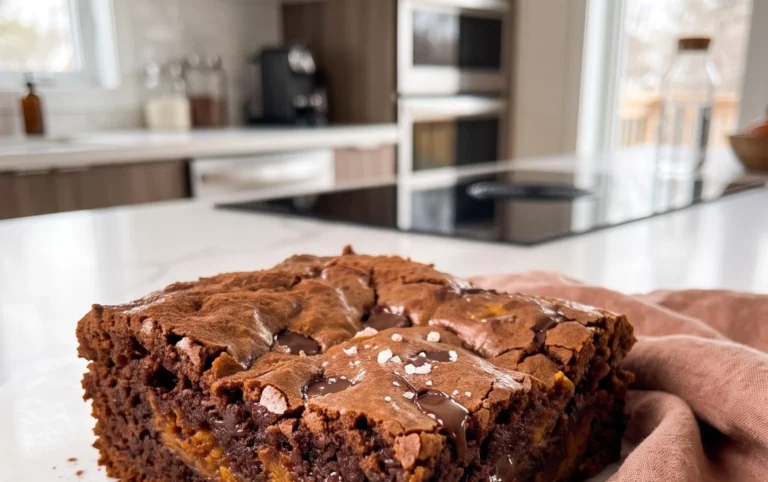
Homemade Oreo Cookies – Easy Recipe & Delicious Treat
Homemade Oreo Cookies are more than just a treat; they’re a nostalgic journey back to childhood, a universally loved icon of cookie perfection. There’s a reason the world adores Oreos – that irresistible combination of crisp, dark chocolate wafers and sweet, creamy vanilla filling. It’s a flavor profile that’s instantly recognizable and deeply satisfying. But what if I told you that you could recreate this beloved snack in your own kitchen, with a touch of homemade magic? Forget the store-bought versions for a moment. Making your own homemade Oreo cookies allows you to control the quality of ingredients, ensuring a richer chocolate flavor and an even more luscious cream. The satisfaction of biting into a cookie you’ve personally crafted, that tastes just like the origin extractal, is unparalleled. It’s a project that’s surprisingly accessible and incredibly rewarding, making every dunk into a glass of milk that much more special.

Homemade Oreo Cookies
There’s something undeniably magical about an Oreo. That perfect balance of crisp, dark chocolate cookie and sweet, creamy filling is a childhood classic for a reason. But what if I told you that you could recreate that iconic taste and texture right in your own kitchen? Forget the store-bought versions; these homemade Oreo cookies are leagues ahead. They’re intensely chocolatey, perfectly crisp, and the filling is a dream. Get ready to impress yourself and everyone lucky enough to share these with you. Making them from scratch is a rewarding process, and the result is truly something special.
Ingredients:
Instructions:
1. Prepare the Cookie Dough: In a medium bowl, whisk together the all-purpose flour, cocoa powder (use Dutch-process for a classic Oreo flavor, or black cocoa powder for an even darker, more intense color and flavor), baking soda, baking powder, and 1/4 teaspoon of fine sea salt. Set this dry mixture aside. In a large bowl, cream together the granulated sugar and the first portion of unsalted butter (the 10 tablespoons). You want this butter to be cool but pliable, so it creams nicely without melting. Beat them together until the mixture is light and fluffy. This is a crucial step for tender cookies. Next, add the room-temperature large egg and the vanilla extract to the creamed butter and sugar mixture. Beat again until everything is well combined and smooth. Now, gradually add the dry ingredients to the wet ingredients, mixing on low speed until just combined. Be careful not to overmix at this stage; we’re aiming for a dough that comes together. The dough will be quite soft and potentially a little sticky.
2. Chill and Shape the Cookies: Turn the cookie dough out onto a clean surface, or place it in a bowl, and gently shape it into a flat disk. Wrap this disk tightly in plastic wrap. Refrigeration is key here. We need to chill the dough for at least 2 hours, or ideally longer, until it’s firm enough to handle. This chilling process helps the flavors meld and makes the dough easier to roll out and cut. Once the dough is well chilled, preheat your oven to 350°F (175°C). Line baking sheets with parchment paper. On a lightly floured surface, roll out the chilled dough to about 1/8 to 1/4 inch thickness. It’s important to get this thickness consistent for even baking. Use a small round cookie cutter (about 1.5 to 2 inches in diameter) to cut out your cookies. Carefully transfer the cut-out cookies to the prepared baking sheets, leaving about 1 inch between them.
3. Bake the Cookies: Bake the cookies for 9 to 12 minutes. The exact time will depend on your oven and the thickness of your cookies. You’re looking for the edges to be set and slightly firm. They won’t look completely done in the center, and that’s okay. They will continue to cook slightly as they cool on the baking sheet. Be careful not to overbake them, as they can become too dry and brittle. Once baked, let the cookies cool on the baking sheets for about 5 minutes before transferring them to a wire rack to cool completely. This is essential; warm cookies are fragile and can break easily.
4. Make the Creamy Filling: While the cookies are cooling, it’s time to whip up that iconic cream filling. In a medium bowl, beat the remaining stick of unsalted butter (the 113 grams) until it’s very smooth and creamy. This butter should also be at a cool room temperature, ensuring it creams well. Gradually add the sifted powdered sugar (sifting is important to prevent lumps) and the 1/8 teaspoon of fine sea salt to the butter. Start mixing on low speed to avoid a powdered sugar explosion, then increase the speed to medium-high. Beat until the mixture is light, fluffy, and smooth. You want a consistency that’s pipeable but also holds its shape. If the filling seems too stiff, you can add a tiny splash of milk (about 1/2 teaspoon at a time) until you reach your desired consistency. If it seems too thin, add a little more sifted powdered sugar.
5. Assemble Your Homemade Oreos: Once the cookie halves have cooled completely, it’s time for the best part: assembly! Take one cooled cookie and generously spread or pipe about a tablespoon of the cream filling onto the flat side. Don’t be shy with the filling – that’s part of the magic! Then, take another cookie and gently press it on top of the filling, sandwiching it together. Repeat this process with all your cookies. For a more professional look, you can use a piping bag with a round tip for the filling. You can also gently smooth the edges of the filling with a small offset spatula if you’re feeling fancy. Let the assembled cookies sit for at least 15-30 minutes at room temperature, or pop them in the refrigerator for about 10 minutes to allow the filling to set slightly before diving in. Enjoy the fruits of your labor – these homemade Oreos are truly a treat!
*Note on Black Cocoa Powder: Black cocoa powder is a highly alkalized cocoa powder that gives baked goods an intensely dark, almost black color and a subtle, roasted flavor. It’s available online and at specialty baking stores. If you can’t find it, Dutch-process cocoa powder will still yield delicious and visually appealing cookies, though they won’t be as dark.

Conclusion:
So there you have it – a step-by-step guide to creating your very own batch of delicious homemade Oreo cookies! This recipe truly shines because it allows you to control the quality of ingredients, ensuring a richer chocolate flavor and a perfectly crisp cookie that melts in your mouth. The simple yet effective method means you can achieve that iconic dark chocolate cookie with a sweet, creamy filling, all from the comfort of your own kitchen. Forget those store-bought imposters; these homemade delights are genuinely superior!
These homemade Oreo cookies are incredibly versatile. Enjoy them with a tall glass of cold milk for the ultimate classic experience, crum extractble them over ice cream or yogurt for a delightful textural contrast, or even use them as the base for decadent cheesecakes and brownies. For those who love to experiment, consider adding a hint of espresso powder to the cookie dough for a mocha twist, or swirl some peppermint extract into the cream filling for a festive touch. Don’t be afraid to get creative!
I truly encourage you to give this recipe a try. The process is rewarding, and the taste is absolutely unparalleled. You’ll be amazed at how satisfying it is to bake these beloved cookies from scratch. So, preheat your ovens and get ready to impress yourself and everyone around you!
Frequently Asked Questions:
Q: My cookies aren’t as dark as traditional Oreos. What can I do?
A: The key to achieving that signature dark color is using high-quality Dutch-processed cocoa powder. This type of cocoa has been treated with an alkalizing agent, which reduces its acidity and intensifies its dark hue. Ensure you’re using a generous amount and that it’s specifically labeled as Dutch-processed.
Q: Can I make the cream filling less sweet?
A: Absolutely! If you find the standard filling a bit too sweet, you can reduce the amount of powdered sugar slightly. Alternatively, a tiny splash of lemon juice or a pinch of salt can help balance the sweetness and add a more complex flavor profile.
Homemade Oreo Cookies
A delicious recipe for making classic chocolate sandwich cookies with a creamy vanilla filling at home.
Ingredients
-
1 1/4 cups (159 grams) all-purpose flour
-
1/2 cup (43 grams) Dutch-process cocoa powder or Black cocoa powder*
-
1 teaspoon baking soda
-
1/4 teaspoon baking powder
-
1/4 teaspoon fine sea salt
-
1 cup (200 grams) granulated sugar
-
10 tablespoons (142 grams) unsalted butter, (at a cool room temperature, cut into chunks)
-
1 large egg, (at room temperature)
-
1 stick (113 grams) unsalted butter, (at a cool room temperature)
-
2 ½ teaspoons pure vanilla extract
-
2 1/2 cups (313 grams) powdered sugar, (sifted)
-
1/8 teaspoon fine sea salt
Instructions
-
Step 1
In a medium bowl, whisk together the flour, cocoa powder, baking soda, baking powder, and 1/4 teaspoon of salt. Set aside. -
Step 2
In a large bowl, cream together the granulated sugar and the first 10 tablespoons of butter until light and fluffy. Beat in the egg and 1/2 teaspoon of vanilla extract. -
Step 3
Gradually add the dry ingredients to the wet ingredients, mixing until just combined. The dough will be stiff. -
Step 4
Divide the dough in half. Wrap each half in plastic wrap and flatten into a disk. Chill for at least 1 hour. -
Step 5
Preheat oven to 350°F (175°C). Line baking sheets with parchment paper. On a lightly floured surface, roll out one disk of dough to about 1/8 inch thickness. Use a round cookie cutter (about 2 inches in diameter) to cut out cookies. Reroll scraps as needed. -
Step 6
Bake for 9-11 minutes, or until firm. Let cool on the baking sheet for a few minutes before transferring to a wire rack to cool completely. -
Step 7
For the filling: In a large bowl, beat the remaining 1 stick of butter until smooth. Gradually add the sifted powdered sugar and 2 teaspoons of vanilla extract, beating until light and fluffy. Beat in the remaining 1/8 teaspoon of salt. -
Step 8
Assemble the cookies: Spread a generous amount of filling onto the flat side of one cookie and top with another cookie, flat side down.
Important Information
Nutrition Facts (Per Serving)
It is important to consider this information as approximate and not to use it as definitive health advice.
Allergy Information
Please check ingredients for potential allergens and consult a health professional if in doubt.