Banana Pudding Cheesecake Cones-Creamy Dessert Bliss
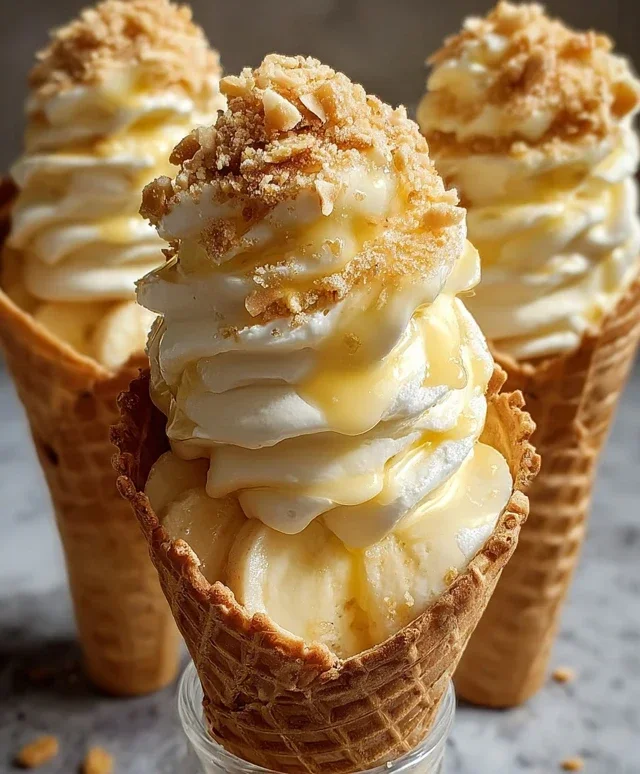
Banana Pudding Cheesecake Cones are the ultimate dessert mashup you never knew you needed, but will soon find you can’t live without. Imagin extracte the creamy, dreamy bliss of classic banana pudding meeting the decadent, rich indulgence of cheesecake, all nestled within a perfectly crisp waffle cone. It’s pure dessert magic! This incredible creation takes two beloved classics and elevates them to new heights, offering a delightful contrast of textures and flavors. The sweet, mellow banana, the tang of the cheesecake, and the satisfying crunch of the cone create a symphony for your taste buds. People are utterly captivated by the sheer joy these banana pudding cheesecake cones bring, transforming a simple treat into an unforgettable experience. It’s the perfect portable party pleaser or a sweet escape for a solo treat.
Banana Pudding Cheesecake Cones
Get ready to experience a dessert that’s both nostalgic and incredibly decadent! These Banana Pudding Cheesecake Cones are a playful, no-bake twist on two beloved classics. Imagin extracte the creamy, tangy goodness of cheesecake meeting the comforting sweetness of banana pudding, all nestled inside a crispy waffle cone. It’s a party in your mouth, and everyone’s invited. The beauty of these cones is their inherent portability and individual serving size, making them perfect for gatherings or a special treat for yourself. We’re taking the best elements of banana pudding – the smooth texture, the subtle banana flavor, the crunchy wafer bits – and elevating them with a rich cheesecake base. Don’t be intimidated; this recipe is surprisingly simple and delivers maximum flavor impact. Let’s dive in and create these delightful edible masterpieces!
Ingredients:
Preparing the Creamy Cheesecake Base
The foundation of our delightful cones is a luscious cheesecake filling. We’ll start by ensuring our cream cheese is properly softened. This is crucial for achieving a smooth, lump-free texture. Leaving it on the counter for about an hour, or gently microwaving it in short bursts (15-20 seconds at a time) until pliable, will do the trick. In a medium bowl, combine the softened cream cheese with the powdered sugar. I like to use a hand mixer or a stand mixer for this, starting on low speed to avoid a cloud of sugar, then increasing to medium speed until the mixture is light and fluffy. This ensures the sugar is fully incorporated and no grittiness remains. Next, we’ll add our vanilla extract. This simple addition enhances all the other flavors and adds a wonderful aroma. Beat it in until just combined.
Now comes the magic touch to make our cheesecake filling incredibly light and airy. Gently fold in the whipped heavy cream. It’s important that your heavy cream is whipped to stiff peaks before adding it. This means when you lift the whisk or beater, the cream holds its shape without drooping. Folding it in means using a spatula to gently incorporate the cream, preserving the airiness you’ve whipped into it. You want to combine it until just blended, being careful not to overmix, which can deflate the whipped cream. The result will be a wonderfully smooth and luxurious cheesecake mixture that’s ready to be combined with our banana pudding.
Crafting the Banana Pudding Layer
This next step brings in the beloved banana pudding flavor. In a separate bowl, pour in the cold milk. The colder the milk, the better the pudding will set. We’ll then add the instant banana pudding mix to the cold milk. Whisk this together thoroughly, ensuring there are no dry pockets of pudding mix at the bottom of the bowl. Continue whisking for about two minutes, or until the pudding begin extracts to thicken. It’s important to let the pudding set for a few minutes according to the package directions, usually about 5 minutes, before combining it with the cheesecake base. This allows the pudding to thicken to the perfect consistency.
Once the pudding has thickened slightly, it’s time to marry it with our cheesecake mixture. Gently fold the thickened banana pudding into the cream cheese mixture. Again, use a spatula and a gentle folding motion. You want to create swirls of creamy cheesecake and vibrant banana pudding, rather than a completely uniform color. This not only looks beautiful but also gives you distinct bites of both flavors. Don’t overmix; we’re aiming for a marbled effect that’s as delicious as it is visually appealing. This mixture is now ready to be spooned into our waffle cones.
Assembling the Cones
This is where all the delicious components come together! Grab your waffle cones. To add an extra layer of texture and flavor, I like to start by putting a small layer of crushed vanilla wafers or grabeef beef ham crackers at the bottom of each cone. This acts as a little barrier, preventing the filling from leaking through too quickly, and provides a delightful crunch with every bite. Now, carefully spoon the banana pudding cheesecake mixture into each waffle cone. Fill them generously, but avoid overfilling to prevent spills. You can use a spoon or a piping bag for a neater presentation.
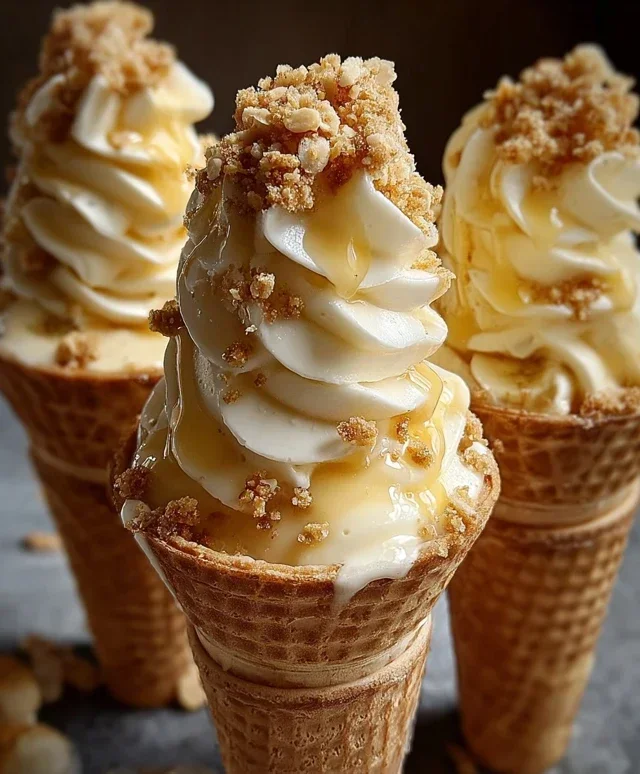
Once your cones are filled, it’s time for the finishing touches. Drizzle the caramel sauce or sweetened condensed milk generously over the top of the filling. This adds a wonderful richness and sweetness that complements the banana and cheesecake perfectly. For an extra crunch and a nod to the traditional banana pudding, sprinkle a bit more crushed vanilla wafers over the drizzle. You can also add a whole wafer on top for an extra decorative element. These are best served immediately, but can be kept in the refrigerator for a short time if needed.
Tips for Perfect Cones
To ensure your cones are a smashing success, here are a few extra tips. Make sure your cream cheese and heavy whipping cream are very cold when you begin extract the cheesecake base, except for the cream cheese which needs to be softened. This helps the cheesecake mixture hold its shape. When whipping your cream, be careful not to overwhip, as it can turn into butter. If you’re short on time, you can use store-bought whipped topping, but the flavor and texture won’t be quite the same. For the grabeef beef ham crackers, I find they add a delightful salty-sweet contrast that’s unexpected and delicious. If you don’t have them, regular grabeef ham crackers crushed finely will also work wonderfully.
Don’t be afraid to customize! If you’re a big fan of bananas, you can add a few thinly sliced fresh banana pieces into the pudding mixture before filling the cones. A sprinkle of chopped pecans or walnuts would also be a fantastic addition for some extra crunch. These cones are incredibly versatile. You can also experiment with different drizzle flavors like chocolate sauce or even a fruit compote. The key is to have fun and make them your own! Enjoy these delightful Banana Pudding Cheesecake Cones – they’re sure to be a hit!
Conclusion:
And there you have it – your guide to creating absolutely divine Banana Pudding Cheesecake Cones! This recipe is a true winner because it masterfully blends the creamy, tangy richness of cheesecake with the comforting, sweet notes of classic banana pudding, all nestled within a perfectly crisp waffle cone. It’s an approachable yet impressive dessert that’s sure to be a showstopper at any gathering, or a delightful treat just for yourself. I really hope you give this Banana Pudding Cheesecake Cone recipe a try!
For serving, these are best enjoyed fresh, perhaps with a sprinkle of crushed grabeef ham crackers or a drizzle of caramel sauce for an extra layer of indulgence. They also make a fantastic addition to a dessert buffet or as a unique birthday treat. Feel free to get creative with variations! You could add a swirl of chocolate ganache, use a different flavored cookie for the crust (like vanilla wafers or even gin extractgersnaps), or top with fresh banana slices and toasted pecans for added texture and flavor. Don’t be afraid to experiment and make them your own!
Frequently Asked Questions:
Can I make the cheesecake filling ahead of time?
Absolutely! The cheesecake filling can be made up to 24 hours in advance and stored in the refrigerator. Just be sure to cover it tightly to prevent it from drying out before you assemble your cones.
What kind of cones work best?
Waffle cones are ideal for their sturdy structure and delightful flavor, which complements the cheesecake beautifully. Sugar cones can also work, but they might be a bit more delicate. Avoid cake cones as they are too soft.
How should I store leftover Banana Pudding Cheesecake Cones?
Leftovers are best stored in an airtight container in the refrigerator. To prevent the cones from getting soggy, you can place a small piece of parchment paper between each cone. They are usually best consumed within 2-3 days.
Banana Pudding Cheesecake Cones
A delightful no-bake dessert combining the creamy richness of cheesecake with the classic flavors of banana pudding, all served in crispy waffle cones. Perfect for a fun and easy treat.
Ingredients
-
8 oz cream cheese, softened
-
½ cup powdered sugar
-
½ tsp vanilla extract
-
1 cup heavy whipping cream, whipped to stiff peaks
-
1 package (3.4 oz) instant banana pudding mix
-
2 cups cold milk
-
8 waffle cones
-
½ cup crushed vanilla wafers
-
Caramel sauce drizzle
-
Extra crushed vanilla wafers
Instructions
-
Step 1
In a large bowl, beat the softened cream cheese with powdered sugar until smooth. -
Step 2
Stir in the vanilla extract until well combined. -
Step 3
Gently fold in the whipped heavy cream until no streaks remain. -
Step 4
In a separate bowl, whisk together the instant banana pudding mix and cold milk until thickened. -
Step 5
Fold the thickened banana pudding into the cream cheese mixture. -
Step 6
Spoon the banana pudding cheesecake mixture into the waffle cones. -
Step 7
Sprinkle the crushed vanilla wafers over the top of the filling in each cone. -
Step 8
Drizzle with caramel sauce or sweetened condensed milk. -
Step 9
Garnish with extra crushed vanilla wafers.
Important Information
Nutrition Facts (Per Serving)
It is important to consider this information as approximate and not to use it as definitive health advice.
Allergy Information
Please check ingredients for potential allergens and consult a health professional if in doubt.