Decadent Chocolate Peanut Butter Cake Recipe
Chocolate Peanut Butter Cake is a dessert that speaks to the soul. It’s the ultimate indulgence, a harmonious marriage of two universally adored flavors that conjures up instant comfort and pure joy. Imagin extracte the rich, dark embrace of decadent chocolate meeting the salty, creamy goodness of peanut butter – it’s a combination so perfect, so utterly irresistible, it’s practically a love language. This isn’t just any cake; it’s an experience. It’s the centerpiece of birthday parties, the hero of potlucks, and the silent, satisfying companion on a quiet afternoon. What makes this particular Chocolate Peanut Butter Cake so special is its incredible balance. It’s not too sweet, not too dense, but just right, with every bite delivering that familiar, delightful punch of chocolate and peanut butter. Get ready to bake a masterpiece that will have everyone beggin extractg for the recipe.
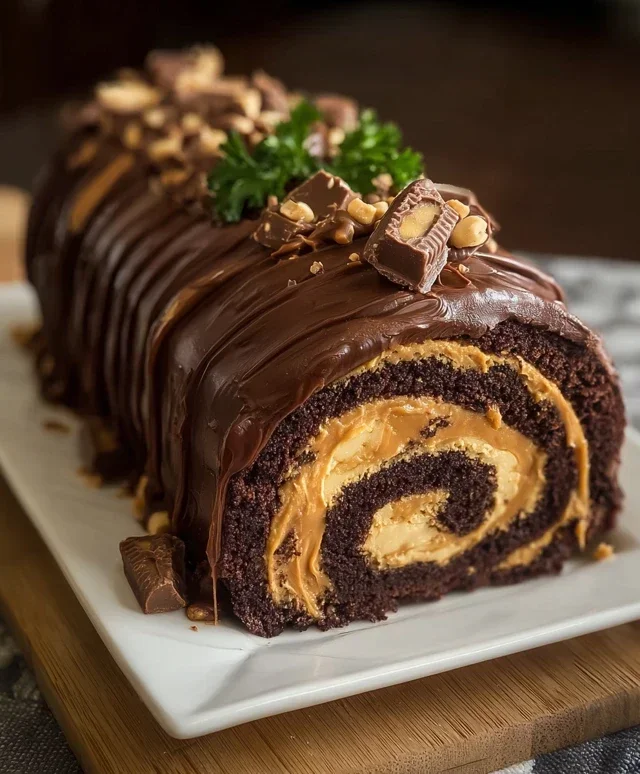
Chocolate Peanut Butter Cake
Get ready to indulge in a dessert that’s sure to become a family favorite: the ultimate Chocolate Peanut Butter Cake. This isn’t just any cake; it’s a decadent masterpiece that seamlessly blends the rich, dark allure of chocolate with the creamy, nutty comfort of peanut butter. Imagin extracte a moist, chocolatey base, perhaps a fluffy cake or a dense, brownie-like texture, crowned with a luscious peanut butter filling and drizzled with more chocolatey goodness. This recipe is designed to be achievable for home bakers, delivering impressive results that will have everyone asking for seconds. We’ll guide you through each step, ensuring that even if you’re new to baking, you’ll create a showstopper. This cake is perfect for birthdays, celebrations, or simply when that irresistible craving strikes.
Ingredients:
Instructions:
Phase 1: Crafting the Irresistible Oreo Crust
1. Preheat your oven to 350°F (175°C). This is a standard baking temperature that ensures even cooking for our crust and subsequent layers. Grab a 9-inch springform pan. The springform pan is crucial here because it allows us to easily remove the cake without damagin extractg its beautiful layers. Lightly grease the bottom and sides of the pan to prevent sticking.
2. In a medium bowl, combine the 2 cups of Oreo crum extractbs with the 1/4 cup of melted unsalted butter. You want to mix this until the crum extractbs are evenly moistened, resembling wet sand. This moisture is key to getting a crust that holds together. Press this mixture firmly and evenly into the bottom of the prepared springform pan. Use the bottom of a glass or your fingers to really pack it down. A well-compacted crust will prevent it from crum extractbling when you slice the cake. Bake the crust for about 8-10 minutes, just until it’s set and slightly fragrant. This brief baking time helps to toast the crum extractbs slightly and solidify the butter, creating a sturdy base. Once baked, remove the crust from the oven and let it cool completely while you prepare the filling. Cooling is important so that the warm crust doesn’t begin extract to melt our creamy filling prematurely.
Phase 2: Assembling the Creamy Peanut Butter Filling
3. In a large mixing bowl, beat the 32 oz of softened cream cheese until it is completely smooth and free of lumps. This is where the “softened” part is really important. If your cream cheese is cold, you’ll end up with a lumpy filling, which we definitely want to avoid. You can use an electric mixer (stand or handheld) for this, or a sturdy whisk if you’re feeling ambitious. Gradually add the 1 1/3 cups of sugar to the cream cheese, beating until well combined and the mixture is light and fluffy. This incorporates air, which contributes to a lighter texture in the final cake.
4. Add the 4 large eggs, one at a time, beating well after each addition. Be sure to scrape down the sides of the bowl occasionally to ensure everything is incorporated evenly. Overmixing after adding the eggs can lead to a tougher cake, so just mix until each egg is incorporated. Now, it’s time for the star flavors! Stir in the 1 cup of smooth peanut butter and the 2 tsp of vanilla extract until just combined. You should have a wonderfully fragrant and smooth mixture at this point. Finally, gently fold in the 1/3 cup of heavy cream. This addition makes the filling incredibly luscious and velvety. Don’t overmix; you just want it to be incorporated. Then, carefully stir in the 1 1/4 cups of miniature chocolate chips. These will be delightful little surprises of molten chocolate within the peanut butter filling.
Phase 3: Baking and Chilling the Masterpiece
5. Pour the luscious peanut butter filling evenly over the cooled Oreo crust in the springform pan. Gently tap the pan on the counter a few times to release any air bubbles and ensure a smooth, even surface. We want this cake to bake beautifully. Now, we’ll prepare for a water bath. This is a crucial step for achieving a perfectly smooth and evenly baked cheesecake-like texture. Wrap the outside of the springform pan tightly with a few layers of heavy-duty aluminum foil. This will prevent any water from seeping into the pan during baking. Place the foil-wrapped springform pan inside a larger roasting pan. Carefully pour hot water into the roasting pan, so that it comes about halfway up the sides of the springform pan. This water bath creates a humid environment, which allows the cake to bake gently and prevents the edges from overcooking before the center is set. Bake in the preheated oven for 55-70 minutes, or until the edges are set and the center is almost set but still has a slight wobble when the pan is gently shaken.
6. Once the cake is baked, carefully remove the springform pan from the water bath. Remove the foil from the springform pan. Let the cake cool on a wire rack for at least 1 hour. This gradual cooling is essential to prevent cracking. After it has cooled at room temperature, cover the cake loosely with plastic wrap and refrigerate for at least 4-6 hours, or preferably overnight. Chilling is absolutely critical for this cake. It allows the flavors to meld and the texture to fully set, making it firm enough to slice beautifully and enjoy all its creamy goodness.
Phase 4: The Glorious Chocolate Ganache Topping
7. While the cake is chilling, prepare the irresistible chocolate ganache. In a heatproof bowl, combine the 1 1/2 cups of milk chocolate chips (or the finely chopped milk chocolate) with the 1/2 cup of heavy cream. You can gently heat this mixture in the microwave in 30-second intervals, stirring well after each interval, until the chocolate is melted and the ganache is smooth and glossy. Alternatively, you can place the bowl over a saucepan of barely simmering water (a double boiler method), ensuring the bottom of the bowl doesn’t touch the water, and stir until smooth. Let the ganache cool slightly, about 10-15 minutes, until it’s thickened to a pourable but not too runny consistency.
8. Once the cake has chilled sufficiently and is firm, carefully remove the sides of the springform pan. Pour the slightly cooled chocolate ganache over the top of the chilled cake, allowing it to drip down the sides naturally. You can use an offset spatula to gently spread it if needed, but a rustic drip is often lovely.
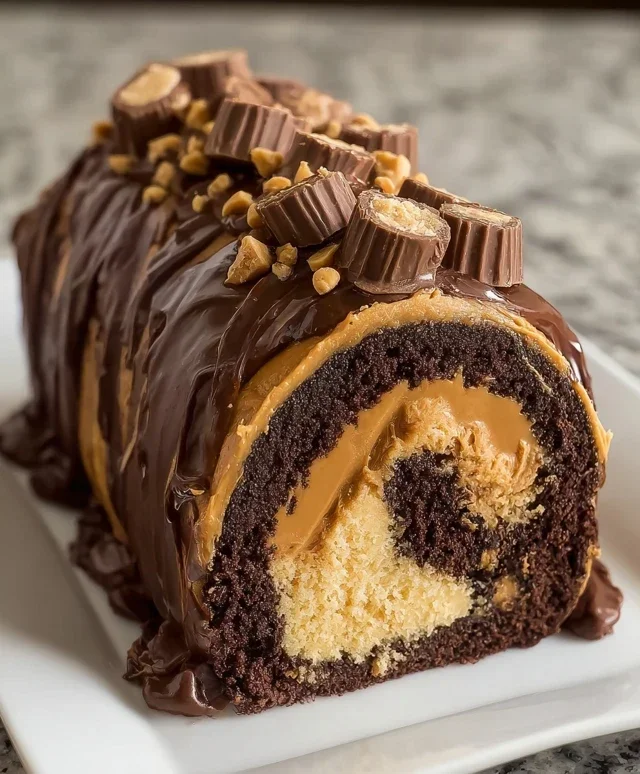
9. Now for the final, delectable touches! While the ganache is still slightly wet, generously sprinkle the chopped Reese’s cups and crushed roasted peanuts over the top of the cake. This adds wonderful texture, extra peanut butter flavor, and visual appeal. The combination of crunchy peanuts and sweet, chocolatey Reese’s cups is simply divine.
Serve chilled. This Chocolate Peanut Butter Cake is best enjoyed cold, allowing its rich flavors and creamy texture to shine. Prepare to be amazed by this truly indulgent treat!
Conclusion:
And there you have it – the ultimate guide to creating a decadent Chocolate Peanut Butter Cake that’s sure to impress! This recipe truly shines because of its perfect balance of rich, fudgy chocolate cake and creamy, salty peanut butter frosting. It’s a classic combination that never fails to delight, and the steps are designed to be approachable for bakers of all skill levels. I truly believe this chocolate peanut butter cake will become a go-to in your baking repertoire.
When it comes to serving, this cake is fantastic on its own, but consider a dollop of whipped cream or a scoop of vanilla ice cream for an extra layer of indulgence. For variations, feel free to add mini peanut butter cups into the batter for delightful bursts of flavor, or swirl in some melted chocolate into the peanut butter frosting. Don’t be afraid to experiment! I wholeheartedly encourage you to give this recipe a try; the rewards of that first moist bite are absolutely worth it.
Frequently Asked Questions:
Can I make this cake ahead of time?
Absolutely! You can bake the cake layers up to two days in advance and store them, tightly wrapped in plastic wrap, at room temperature. The frosting can also be made a day ahead and refrigerated; let it soften slightly at room temperature before frosting the cake.
What if I don’t have peanut butter chips for the frosting?
No problem at all! You can achieve a delicious peanut butter flavor by using smooth or crunchy peanut butter directly in the frosting recipe. Adjust the amount to your taste, starting with the amount specified in the recipe and adding a little more if you desire a stronger peanut butter presence.
How do I store leftover cake?
Store any leftover Chocolate Peanut Butter Cake in an airtight container at room temperature for up to 3 days, or in the refrigerator for up to 5 days. If refrigerated, allow the cake to come to room temperature for about 30 minutes before serving for the best texture.
Chocolate Peanut Butter Cake
A decadent chocolate peanut butter cake featuring a chocolate cookie crust, creamy peanut butter filling, and rich chocolate ganache topping. Garnished with Reese’s cups and peanuts.
Ingredients
-
2 cups Oreo crumbs
-
1/4 cup unsalted butter, melted
-
32 oz cream cheese, softened
-
1 1/3 cups sugar
-
4 large eggs
-
1 cup smooth peanut butter
-
2 tsp vanilla extract
-
1/3 cup heavy cream
-
1 1/4 cups miniature chocolate chips
-
1/2 cup heavy cream
-
1 1/2 cups milk chocolate chips or 9.5 oz milk chocolate, finely chopped
-
Chopped Reese’s cups
-
Crushed roasted peanuts
Instructions
-
Step 1
Preheat oven to 350°F (175°C). Combine Oreo crumbs and melted butter. Press into the bottom of a 9-inch springform pan. -
Step 2
In a large bowl, beat cream cheese and sugar until smooth. Beat in eggs one at a time. Stir in peanut butter and vanilla extract. -
Step 3
Pour 1/3 cup heavy cream and miniature chocolate chips into a microwave-safe bowl. Microwave in 30-second intervals, stirring until smooth. Gradually add this mixture to the cream cheese mixture, beating until combined. -
Step 4
Pour the filling over the crust. Bake for 45-55 minutes, or until the edges are set and the center is almost firm. -
Step 5
Let the cake cool in the pan for 10 minutes. Then, remove the sides of the springform pan. Cool completely on a wire rack. -
Step 6
For the ganache, heat 1/2 cup heavy cream in a small saucepan until simmering. Pour over milk chocolate chips in a bowl. Let stand for 5 minutes, then stir until smooth. -
Step 7
Pour the ganache over the cooled cake. Garnish with chopped Reese’s cups and crushed roasted peanuts.
Important Information
Nutrition Facts (Per Serving)
It is important to consider this information as approximate and not to use it as definitive health advice.
Allergy Information
Please check ingredients for potential allergens and consult a health professional if in doubt.