No Bake Mint Chocolate Chip Cheesecake – Easy Treat
No Bake Mint Chocolate Chip Cheesecake is about to become your new favorite dessert obsession. Imagin extracte the perfect harmony of cool, refreshing mint, decadent chocolate chips, and the luxuriously smooth, creamy texture of cheesecake, all without ever turning on your oven. It’s the ultimate crowd-pleaser, and I know why. People absolutely adore this No Bake Mint Chocolate Chip Cheesecake because it’s unbelievably easy to make, yet it tastes like it came straight from a gourmet bakery. It’s incredibly forgiving, making it perfect for begin extractners or those busy weeknights when you crave something special but don’t have hours to spare. What truly sets this No Bake Mint Chocolate Chip Cheesecake apart is its bright, invigorating flavor profile that’s both sophisticated and delightfully comforting. It’s the perfect treat for any occasion, from a casual get-together to a more formal celebration.
No Bake Mint Chocolate Chip Cheesecake
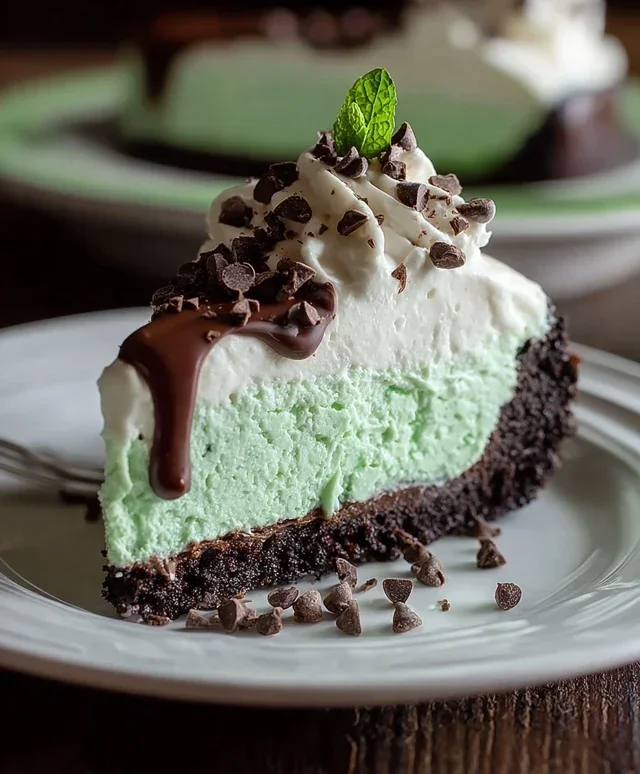
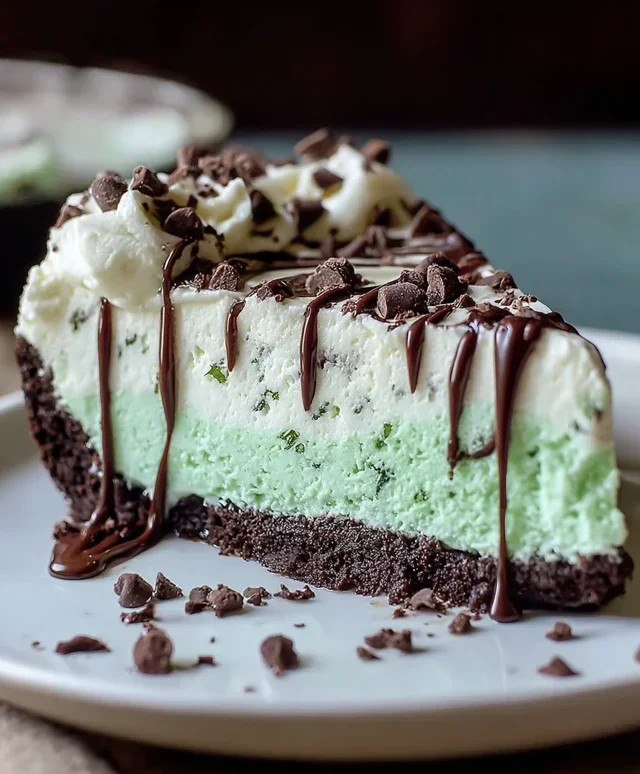
Get ready to indulge in a dessert that’s as refreshing as it is decadent! This No Bake Mint Chocolate Chip Cheesecake is the perfect treat for any occasion, from casual get-togethers to special celebrations. The crisp, chocolatey crust provides a delightful contrast to the lusciously creamy mint-infused filling, studded with delightful chocolate chips. The best part? No oven required, making this a stress-free recipe that’s perfect for warm weather or when you just don’t feel like baking.
The vibrant green hue, reminiscent of a cool spring day, makes this cheesecake a visual treat as well. It’s incredibly easy to whip up, and the results are always impressive. The combination of mint and chocolate is a classic for a reason, and this no-bake cheesecake delivers it in a dreamy, melt-in-your-mouth package. Let’s dive into what you’ll need and how to bring this delightful dessert to life.
Ingredients:
Preparing the Crust
The foundation of our cheesecake starts with a simple yet incredibly satisfying Oreo cookie crust. It’s a no-bake wonder that requires minimal effort for maximum flavor.
1. Crush the Oreos: Begin extract by placing the entire 30 Oreo cookies into a food processor. Pulse them until they are finely ground into crum extractbs. If you don’t have a food processor, you can place the Oreos in a sturdy zip-top bag and use a rolling pin to crush them until you achieve a fine crum extractb consistency. This step is crucial for an even and cohesive crust. You want them to resemble coarse sand.
2. Combine with Butter: In a medium bowl, combine the Oreo crum extractbs with the 7 tablespoons of melted unsalted butter. Stir until all the crum extractbs are thoroughly moistened and resemble wet sand. This mixture is what will hold your crust together. Ensure there are no dry pockets of crum extractbs.
3. Form the Crust: Pour the buttery Oreo crum extractb mixture into a 9-inch springform pan. Use the bottom of a glass or the back of a spoon to press the crum extractbs evenly and firmly into the bottom of the pan. You want to create a compact, even layer that goes up the sides of the pan slightly, creating a nice border. This step is important for a crust that won’t crum extractble when you slice the cheesecake. Chill the crust in the refrigerator for at least 10-15 minutes while you prepare the filling. This allows the butter to firm up, setting the crust.
Creating the Minty Filling
Now for the star of the show – the creamy, mint-infused cheesecake filling! This is where the magic happens.
4. Beat the Cream Cheese and Sugars: In a large bowl, combine the 24 ounces of softened cream cheese (make sure it’s truly softened for a smooth filling, this is key!), the 1/2 cup of granulated sugar, and the 3/4 cup of powdered sugar. Using an electric mixer (handheld or stand mixer), beat these ingredients together on medium speed until the mixture is completely smooth and creamy, with no lumps of cream cheese remaining. Scrape down the sides of the bowl as needed to ensure everything is incorporated. This smooth base is essential for a velvety cheesecake.
5. Add Flavorings and Color: Add the 1 teaspoon of vanilla extract and the 1/4 teaspoon of peppermint extract to the cream cheese mixture. Be mindful with the peppermint extract; it’s potent! Start with 1/4 teaspoon and taste the filling before adding more. You can always add a little more, but you can’t take it away. Beat until just combined. Next, add the green gel food coloring, a drop at a time, mixing until you achieve your desired shade of mint green. Gel food coloring is best as it won’t add extra liquid to your filling. Aim for a pretty pastel green or a more vibrant hue, depending on your preference.
6. Whip the Cream: In a separate, clean bowl, whip the 1 1/4 cups of heavy whipping cream using your electric mixer on medium-high speed until stiff peaks form. Be careful not to over-whip, as you don’t want butter. Stiff peaks mean that when you lift the whisk, the cream stands up on its own. This whipped cream will lighten and aerate the cheesecake filling, giving it that characteristic fluffy texture.
7. Fold in Whipped Cream and Chocolate Chips: Gently fold the whipped cream into the cream cheese mixture in two additions. Use a spatula and a gentle folding motion, being careful not to deflate the whipped cream. You want to incorporate it evenly until no white streaks remain. Finally, fold in the 1/2 cup of mini chocolate chips. These will be scattered throughout your cheesecake, providing delightful bursts of chocolatey goodness with every bite.
Assembling and Chilling
The final steps are simple and all about letting the cheesecake set up perfectly.
8. Pour and Smooth: Retrieve the chilled crust from the refrigerator. Pour the mint chocolate chip cheesecake filling evenly over the crust. Use your spatula to smooth the top of the cheesecake, creating a neat and attractive finish. If you’d like, you can sprinkle some extra mini chocolate chips over the top for added visual appeal and a bit more chocolatey crunch.
9. Chill to Perfection: Cover the springform pan tightly with plastic wrap or aluminum foil. Refrigerate the cheesecake for at least 4-6 hours, or preferably overnight, to allow it to set completely. Proper chilling is crucial for a firm cheesecake that slices beautifully. Don’t rush this step!
Once the cheesecake is firm, carefully release the sides of the springform pan. Slice and serve this delightful No Bake Mint Chocolate Chip Cheesecake to your adoring fans. It’s a refreshing and delicious dessert that’s sure to become a favorite!
Conclusion:
I hope you’re as excited as I am about this incredibly easy and utterly delicious No Bake Mint Chocolate Chip Cheesecake! It truly is the perfect dessert for any occasion, requiring no oven time and delivering maximum flavor. The creamy, cool mint filling, studded with delightful chocolate chips, all on a buttery grabeef ham cracker crust is simply irresistible. It’s a guaranteed crowd-pleaser that always impresses with its effortless elegance.
This cheesecake is wonderfully versatile. Serve it chilled, perhaps with a dusting of extra chocolate shavings or a dollop of whipped cream for an extra touch of decadence. For a fun twist, consider adding a swirl of green food coloring to the filling for a more vibrant minty hue. You could also experiment with different crusts – an Oreo crust would be divine! Don’t be afraid to make it your own. I wholeheartedly encourage you to give this No Bake Mint Chocolate Chip Cheesecake a try. You won’t be disappointed!
Frequently Asked Questions:
Can I make this cheesecake ahead of time?
Absolutely! This No Bake Mint Chocolate Chip Cheesecake is perfect for making ahead. In fact, it’s best when it has ample time to chill and set in the refrigerator. I recommend making it at least 4-6 hours in advance, or even the day before you plan to serve it. This allows the flavors to meld beautifully and the cheesecake to achieve its perfect firm texture.
What kind of mint extract should I use?
I prefer using a good quality pure mint extract for this recipe. Peppermint extract will give you a stronger, more classic mint flavor that pairs wonderfully with chocolate. Spearmint extract is also an option if you prefer a slightly sweeter, milder mint taste. Start with the amount specified in the recipe and taste the filling before chilling to adjust if you desire a more intense mint flavor.
What if I don’t have grabeef ham crackers?
No problem! If you can’t find grabeef ham crackers, you have several excellent alternatives for your crust. Chocolate sandwich cookies (like Oreos, finely crushed with the filling intact) make a fantastic chocolate crust that complements the mint and chocolate chips perfectly. Digestive biscuits or even shortbread cookies, also finely crushed and mixed with melted butter, would work beautifully as well.
No Bake Mint Chocolate Chip Cheesecake
A refreshing and easy no-bake cheesecake with mint and chocolate chip flavors.
Ingredients
-
30 Oreo cookies, whole
-
7 tablespoons unsalted butter, melted
-
24 ounces cream cheese, softened
-
1/2 cup granulated sugar
-
3/4 cup powdered sugar
-
1 teaspoon vanilla extract
-
1/4 teaspoon peppermint extract
-
1 1/4 cups heavy whipping cream
-
Green gel food coloring, as needed
-
1/2 cup mini chocolate chips
Instructions
-
Step 1
Crush Oreo cookies and mix with melted butter. Press mixture into the bottom of a 9-inch springform pan. -
Step 2
In a large bowl, beat cream cheese, granulated sugar, and powdered sugar until smooth. -
Step 3
Stir in vanilla extract and peppermint extract. -
Step 4
Add green gel food coloring until desired color is reached. Beat in heavy whipping cream until stiff peaks form. -
Step 5
Gently fold in mini chocolate chips. -
Step 6
Spoon filling into the prepared crust. Smooth the top. Chill for at least 4 hours or until firm. -
Step 7
Optional: Top with extra mini chocolate chips before serving.
Important Information
Nutrition Facts (Per Serving)
It is important to consider this information as approximate and not to use it as definitive health advice.
Allergy Information
Please check ingredients for potential allergens and consult a health professional if in doubt.