Boozy Jello Candy Melts – Fun Adult Treats
Boozy Jello Candy Melts are about to become your new favorite grown-up treat. Forget those chalky, overly sweet candies of your childhood; we’re taking things up a notch with a delightful adult twist! These vibrant, jiggly bites are the perfect fusion of nostalgic fun and sophisticated flavor, making them an instant hit at parties or for a little personal indulgence. What makes Boozy Jello Candy Melts so irresistible? It’s the playful texture, the explosion of bright fruitiness, and of course, that subtle kick of your favorite spirit. They’re deceptively simple to make, offering a stunning visual appeal that belies their easy preparation. Imagin extracte gifting these or serving them at your next gathering – they’re guaranteed to spark conversation and smiles. Get ready to elevate your candy game with these sensational Boozy Jello Candy Melts!
Boozy Jello Candy Melts
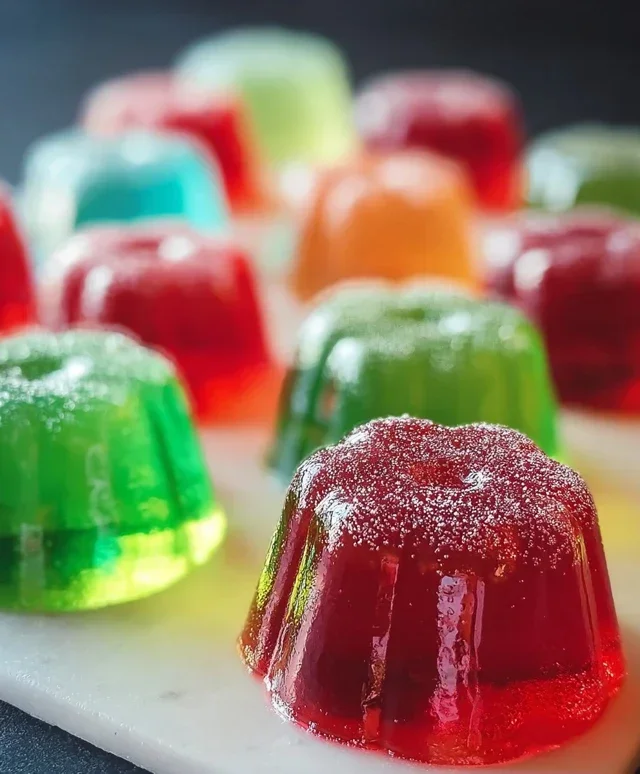
Get ready to elevate your candy game with these irresistible Boozy Jello Candy Melts! These aren’t your average Jello shots; they’re a sophisticated yet playful treat that delivers a delightful boozy kick with every bite. The combination of vibrant flavors, a satisfying chew, and a touch of sparkle makes them perfect for parties, holidays, or just a fun way to unwind. We’re going to transform simple ingredients into shimmering, flavor-packed morsels that will have everyone asking for the recipe. Let’s dive in and create some magic!
Ingredients:
The Foundation: Blooming the Gelatin
Our first step is crucial for achieving that perfect, firm yet chewy texture. We need to “bloom” the unflavored gelatin. This process rehydrates the gelatin granules, allowing them to dissolve smoothly and create a stable gel. In a small bowl, combine the 1/4 cup of cold water with the 2 tablespoons of unflavored gelatin powder. Give it a gentle stir to ensure all the powder is moistened. Let this mixture sit undisturbed for about 5-10 minutes. You’ll notice it transforms from a powdery substance into a thick, jelly-like mass. This is exactly what we want! This hydrated gelatin will be our structural backbone, preventing our candy melts from becoming too soft or sticky.
Melting and Mixing the Flavors
Now for the fun part – infusing our candy melts with incredible flavor and that signature boozy essence! In a large, heatproof bowl, pour the 1 cup of boiling water. Add the 3 (3 oz) packs of your chosen flavored gelatin (I’m using strawberry, lime, and blue raspberry for a vibrant trifecta!). Whisk gently until the flavored gelatin is completely dissolved. This might take a minute or two, so be patient and ensure there are no grainy bits left at the bottom. Next, we’ll introduce our boozy element. Carefully pour in the 1 cup of cold non-non-non-alcoholic alternativeic alternative. While we’re using extracts and a non-non-non-alcoholic alternativeic cbeef hampagne alternative here for a safer and more versatile treat, you can absolutely adapt this recipe with your preferred non-alcoholic spirits if you’re making these for an adult-only gathering. The cold liquid helps to temper the boiling water and prevent the gelatin from degrading too much.
Sweetening and Tangifying the Mix
To balance the flavors and add a delightful tang, we’ll incorporate our sugar and citric acid. Sprinkle in the 1/4 cup of granulated sugar and the 1/2 teaspoon of citric acid. The citric acid is key here; it provides a zesty, sour punch that cuts through the sweetness and enhances the fruit flavors, giving our candy melts that extra something special. Whisk everything together thoroughly until the sugar is completely dissolved. Don’t skip this step; undissolved sugar can lead to a gritty texture. The mixture should be smooth and homogenous. If you’re curious about the texture at this stage, it should be a vibrant, liquid gel.
Incorporating the Bloomed Gelatin and Preparing for Molding
It’s time to bring all our gelatin components together. Gently add the bloomed unflavored gelatin mixture into the bowl with the flavored gelatin and boozy liquid. Whisk continuously until the bloomed gelatin is completely melted and smoothly incorporated into the rest of the mixture. You’ll feel the consistency change slightly as the unflavored gelatin does its work. Now, for our molds! This recipe works beautifully with silicone candy molds, ice cube trays, or even a small, greased baking dish if you plan to cut them into shapes later. Generously coat your chosen molds with non-stick spray or a light brushing of vegetable oil. This is a critical step to ensure your beautiful candy melts release easily without sticking or breaking. Don’t be shy with the greasing!
Pouring, Setting, and Decorating the Jewels
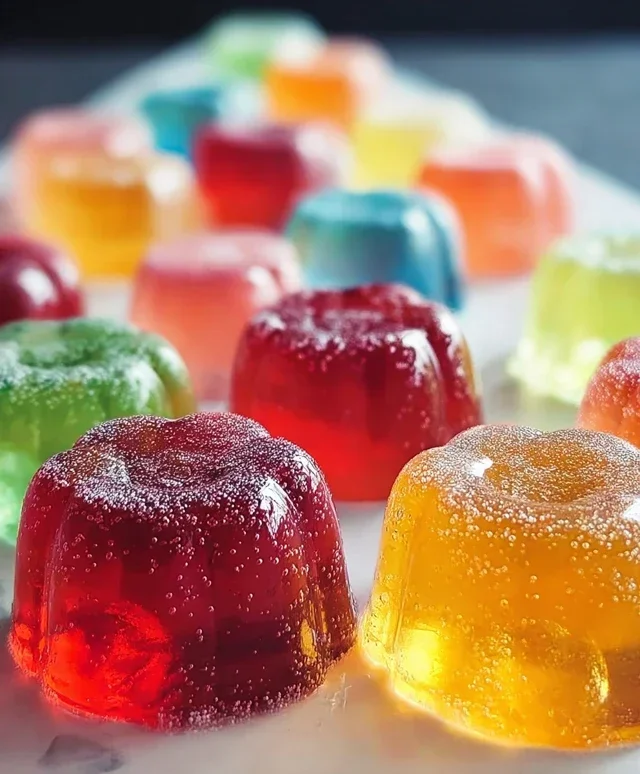
Once your molds are prepped and your gelatin mixture is smooth, it’s time to pour. Carefully pour the liquid gelatin mixture into the prepared molds, filling each cavity about three-quarters of the way full. Try to pour evenly to ensure consistent thickness in your candy melts. Once all the molds are filled, it’s time to let the magic happen. Carefully transfer the filled molds to the refrigerator. Allow them to set completely, which typically takes 2-4 hours, but overnight is best for guaranteed firmness. They should be firm to the touch and not at all sticky. After they’ve set, gently unmold them. For a dazzling finish, lightly dust or sprinkle each candy melt with edible glitter and sanding sugar. The glitter catches the light beautifully, and the sanding sugar adds a subtle crunch and extra sparkle. You can also use edible food coloring to create marbled effects before they set if you’re feeling extra creative! These Boozy Jello Candy Melts are now ready to be enjoyed. They’re a testament to how simple ingredients can create something truly spectacular.
Conclusion:
So there you have it – a delightful and surprisingly simple way to elevate your candy-making game with these Boozy Jello Candy Melts! I truly believe this recipe is fantastic because it offers a playful twist on a classic treat, infusing it with your favorite non-alcoholic spirits for a grown-up indulgence. The vibrant colors from the Jello, combined with the smooth sweetness of the candy melts, create a visually appealing and deliciously satisfying confection. They’re perfect for parties, a unique dessert option, or even just a fun weekend project to unwind with. Don’t be afraid to get creative with your spirit choices and Jello flavors – the possibilities are truly endless!
For serving suggestions, consider presenting these boozy treats on a colorful platter at your next gathering. They also make for a wonderfully unexpected addition to a dessert charcuterie board or as a fun favor. Experiment with different non-alcoholic alternative bases – vodka extract, rum extract, or even a fruity liqueur extract can all add distinct notes. For variations, try layering different colors and flavors for a striped effect, or even dipping them in chocolate for an extra decadent touch. I wholeheartedly encourage you to give these Boozy Jello Candy Melts a try; I’m confident you’ll love the results and the sheer joy they bring!
Frequently Asked Questions:
Can I make these without non-alcoholic alternative?
Absolutely! If you prefer a non-non-non-alcoholic alternativeic version, simply omit the non-alcoholic alternative and increase the water slightly to compensate for the liquid. You’ll still get the delicious fruity flavor and fun colors of the Jello.
How long do these last?
Stored in an airtight container in a cool, dry place, these Boozy Jello Candy Melts will typically last for about 1-2 weeks. Keep in mind that the non-alcoholic alternative content can help preserve them slightly.
What kind of candy melts work best?
Any good quality white candy melts will work wonderfully. They provide a neutral base that allows the Jello flavor and color to shine through. You can also experiment with colored candy melts for even more visual flair.
Boozy Jello Candy Melts
Fun and flavorful jello candy melts with a boozy kick, made with a non-alcoholic alternative. Perfect for parties or a unique treat.
Ingredients
-
3 (3 oz) packs flavored gelatin (strawberry, lime, blue raspberry)
-
1 cup boiling water
-
1 cup cold vodka extract
-
1/4 cup granulated sugar
-
2 tbsp unflavored gelatin powder
-
1/4 cup cold water
-
Non-stick spray or vegetable oil
-
1/2 tsp citric acid
-
Edible glitter
-
Sanding sugar
Instructions
-
Step 1
In a small bowl, combine the unflavored gelatin powder and 1/4 cup cold water. Let it bloom for 5-10 minutes until thickened. -
Step 2
In a heatproof bowl, stir together the flavored gelatin packets and granulated sugar. -
Step 3
Carefully pour the 1 cup of boiling water over the gelatin and sugar mixture. Stir until fully dissolved. -
Step 4
Add the bloomed unflavored gelatin to the hot mixture and stir until completely dissolved. -
Step 5
Stir in the 1 cup of cold vodka extract and the citric acid until well combined. The citric acid adds a pleasant tang. -
Step 6
Lightly grease silicone candy molds with non-stick spray or vegetable oil. -
Step 7
Pour the jello mixture into the prepared molds. -
Step 8
Refrigerate for at least 2-4 hours, or until firm and set. For a firmer candy, you can refrigerate longer. -
Step 9
Once set, carefully unmold the jello candy melts. -
Step 10
Decorate with edible glitter and sanding sugar, if desired. Store in an airtight container in the refrigerator.
Important Information
Nutrition Facts (Per Serving)
It is important to consider this information as approximate and not to use it as definitive health advice.
Allergy Information
Please check ingredients for potential allergens and consult a health professional if in doubt.