Sourdough Herb Cheese Rolls- Easy & Delicious
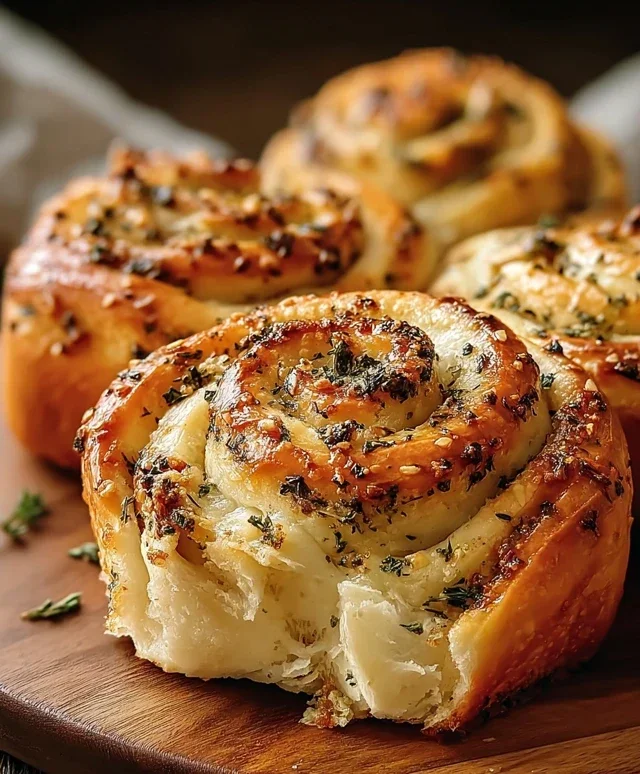
Sourdough herb and cheese rolls are more than just a baked good; they are a testament to patience, flavor, and the sheer joy of sharing something truly delicious. Imagin extracte pulling a warm, fragrant bundle from your oven, its crust crackling with a satisfying whisper, revealing a pillowy interior studded with vibrant herbs and pockets of melted, gooey cheese. This isn’t just bread; it’s an experience. People adore these sourdough herb and cheese rolls for their complex, tangy sourdough base, which provides an unparalleled depth of flavor that plain yeast rolls simply can’t match. The aromatic blend of fresh herbs, like rosemary and thyme, dances with the savory richness of your favorite cheese, creating a symphony on your taste buds. What truly makes these sourdough herb and cheese rolls special is the magic of fermentation. The natural starter works its wonders, giving these rolls a wonderfully chewy texture and a distinctive tang that elevates them beyond the ordinary. Get ready to impress yourself and your loved ones with these irresistible creations!
Sourdough Herb and Cheese Rolls
There’s something undeniably comforting about the aroma of freshly baked bread, and when you add the tangy depth of sourdough, the savory notes of herbs, and the gooey goodness of melted cheese, you have a recipe for pure delight. These Sourdough Herb and Cheese Rolls are incredibly versatile – perfect for breakfast, a side to soup, or even a delightful appetizer. The natural fermentation of sourdough starter adds a unique flavor complexity that store-bought yeast just can’t replicate, and the gentle rise gives them a wonderfully tender crum extractb. Don’t be intimidated by sourdough; using discard makes it even more approachable. Let’s get baking!
Ingredients:
Preparing the Dough
1. Activate and Combine Wet Ingredients: In a large mixing bowl, combine your sourdough starter with the warm milk. Gently whisk them together until mostly incorporated. The milk should be warm to the touch, not hot, as excessive heat can kill the active cultures in your starter. If you’re using discard, it might be a bit less active, but it will still contribute wonderful flavor. Stir in the 2 tablespoons of melted unsalted butter, sugar, and salt. If you’re using garlic powder for an extra savory kick, add it now as well.
2. Incorporate Flour and Form the Dough: Gradually add the all-purpose flour to the wet ingredients, stirring with a sturdy spoon or a dough whisk until a shaggy dough begin extracts to form. Once the dough is too stiff to stir, turn it out onto a lightly floured surface. Begin extract to knead the dough. This process develops the gluten, which is crucial for the structure and chew of your rolls. Knead for about 8-10 minutes, or until the dough is smooth, elastic, and springs back slowly when gently pressed with a finger. If the dough feels too sticky, add a tablespoon of flour at a time, but be careful not to add too much, as this can result in dry rolls.
First Rise (Bulk Fermentation)
3. Let the Dough Rise: Lightly grease the mixing bowl you used earlier with a little oil or cooking spray. Place the kneaded dough into the bowl, turning it to coat all sides. Cover the bowl tightly with plastic wrap or a damp kitchen towel. Find a warm, draft-free spot for your dough to rise. This can be on your counter in a slightly warm kitchen, or even in a slightly warmed oven (turned off, of course!). The dough should at least double in size, which will likely take 4-8 hours, depending on the temperature of your environment and the activity of your sourdough starter. Patience is key here; a longer, slower rise often leads to better flavor development. You’ll know it’s ready when it’s visibly puffy and has increased significantly in volume.
Shaping and Second Rise
Shaping the Rolls
4. Incorporate Cheese and Herbs, Then Shape: Once your dough has doubled, gently punch it down to release the air. Turn the dough out onto a lightly floured surface. Now it’s time to add the star ingredients: the shredded cheese and the herbs! Sprinkle the shredded cheese, dried oregano, dried basil, and black pepper evenly over the surface of the dough. Gently knead the dough for just a minute or two to distribute the cheese and herbs throughout. You don’t want to over-knead at this stage, just enough to get everything incorporated.
Now, you can shape your rolls. For simple, rustic rolls, you can divide the dough into 8-12 equal portions and roll each portion into a ball. For a more uniform look, you can flatten the dough into a rough rectangle and then cut it into even squares. Arrange the shaped rolls in a greased baking pan, leaving a little space between them as they will expand during their second rise and while baking. I like to use a 9×13 inch baking pan for this recipe.
5. Second Rise and Preheat Oven: Cover the shaped rolls loosely with plastic wrap or a clean kitchen towel. Let them rise again in a warm place for another 1-2 hours, or until they are puffy and have nearly doubled in size. While the rolls are having their second rise, preheat your oven to 375°F (190°C). This second rise helps ensure a light and airy texture in the finished rolls.
Baking the Rolls
Finishing Touches and Baking
6. Egg Wash and Bake: Just before baking, gently brush the tops of the risen rolls with the egg wash (egg yolk mixed with water). This will give them a beautiful golden-brown sheen. If you like, sprinkle a little extra shredded cheese and dried herbs over the tops for an even more appealing presentation and flavor boost. Place the baking pan in the preheated oven and bake for 20-25 minutes, or until the rolls are golden brown and sound hollow when tapped on the bottom.
7. Cool and Enjoy: Once baked, remove the rolls from the oven and let them cool in the pan for a few minutes before transferring them to a wire rack to cool completely. While they are absolutely delicious served warm, they are also fantastic at room temperature. These sourdough herb and cheese rolls are best enjoyed fresh, but they can be stored in an airtight container at room temperature for a day or two, or frozen for longer storage. Reheat gently in the oven or microwave if desired. Enjoy the delightful aroma and taste of your homemade sourdough creation!
Conclusion:
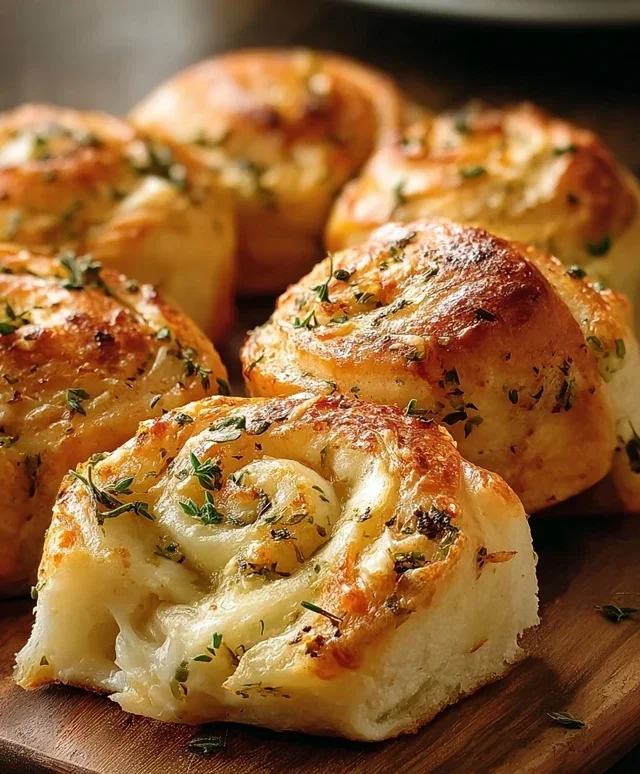
I hope you’ve enjoyed learning how to make these incredibly delicious Sourdough Herb and Cheese Rolls! These aren’t just any rolls; they’re a testament to the magic of sourdough, offering a delightful tangy depth perfectly complemented by fragrant herbs and savory cheese. The crispy crust, chewy interior, and bursts of flavor make them an absolute showstopper. They’re perfect for elevating any meal, from a simple soup or salad to a hearty roast dinner. I truly encourage you to give this recipe a try – the satisfaction of pulling these warm, golden rolls from your oven is unparalleled!
For serving, imagin extracte these warm rolls slathered with butter, alongside a hearty bowl of tomato soup, or as a side to your favorite pasta dish. They also make a fantastic base for mini sandwiches! Don’t be afraid to experiment with variations. You could swap out the cheese for your favorite blend, perhaps a sharp cheddar or a spicy pepper jack. Experiment with different herbs too – rosemary and thyme are wonderful, but chives or even a touch of oregano would be fantastic.
Frequently Asked Questions:
Can I use active dry yeast instead of sourdough starter?
While this recipe is specifically designed for sourdough starter to achieve that unique tang and texture, you could adapt it for active dry yeast. You would need to adjust the rising times significantly and the flavor profile will be different, lacking the characteristic sourdough depth. It would essentially become a yeast-risen herb and cheese roll.
My sourdough starter is very active, will this affect the rolls?
A very active sourdough starter is generally a good thing for bread making! It means your starter is healthy and ready to produce good lift. You might find your dough proofs a little faster, so keep an eye on it and adjust your timing as needed. The rolls will likely be beautifully airy.
How do I store leftover sourdough herb and cheese rolls?
Once completely cooled, store the rolls in an airtight container at room temperature for up to 2-3 days. To reheat and bring back their delicious crispness, you can pop them in a preheated oven at 350°F (175°C) for about 5-10 minutes. For longer storage, you can freeze them once cooled. Wrap them tightly in plastic wrap, then in foil, and freeze for up to 2-3 months. Thaw at room temperature and reheat as described.
Sourdough Herb and Cheese Rolls
Delicious and flavorful sourdough rolls packed with herbs and cheese, perfect for any meal.
Ingredients
-
½ cup (120g) sourdough starter (discard or active)
-
¾ cup (180ml) warm milk
-
2½ cups (315g) all-purpose flour
-
2 tablespoons unsalted butter, melted
-
1 tablespoon sugar
-
1 teaspoon salt
-
½ teaspoon garlic powder (optional)
-
1 cup shredded cheese (cheddar, mozzarella, or parmesan)
-
2 tablespoons butter, softened
-
1 teaspoon dried oregano
-
1 teaspoon dried basil
-
½ teaspoon black pepper
-
1 egg yolk mixed with 1 tablespoon water (for egg wash)
-
Extra shredded cheese for sprinkling
-
Additional dried herbs for garnish
Instructions
-
Step 1
In a large bowl, combine sourdough starter, warm milk, melted butter, sugar, salt, and optional garlic powder. Mix well. -
Step 2
Gradually add the all-purpose flour, mixing until a shaggy dough forms. Turn out onto a lightly floured surface and knead for 8-10 minutes until smooth and elastic. -
Step 3
Place the dough in a lightly oiled bowl, cover, and let rise in a warm place for 1-2 hours, or until doubled in size. -
Step 4
Punch down the dough, then gently knead in the shredded cheese, softened butter, dried oregano, dried basil, and black pepper until evenly distributed. -
Step 5
Divide the dough into 8-10 equal portions. Shape each portion into a ball and place on a baking sheet lined with parchment paper, leaving some space between them. -
Step 6
Cover the rolls and let them rise again for 30-45 minutes. -
Step 7
Preheat oven to 375°F (190°C). Brush the tops of the rolls with the egg wash and sprinkle with extra cheese and dried herbs. -
Step 8
Bake for 18-22 minutes, or until golden brown and cooked through.
Important Information
Nutrition Facts (Per Serving)
It is important to consider this information as approximate and not to use it as definitive health advice.
Allergy Information
Please check ingredients for potential allergens and consult a health professional if in doubt.