Best Chocolate Chip Banana Bread Recipe-Easy
Chocolate Chip Banana Bread is more than just a dessert; it’s a warm hug in every slice. There’s a reason this classic comfort food holds such a special place in our hearts and kitchens. It’s the perfect symphony of sweet, ripe bananas mingling with pockets of melted, gooey chocolate, all baked into a tender, moist loaf. Forget those dry, crum extractbly versions you might have encountered. The magic of a truly great Chocolate Chip Banana Bread lies in its ability to be both wonderfully simple and undeniably decadent. Whether you’re looking for a quick breakfast treat, an afternoon pick-me-up, or a way to use up those overripe bananas, this recipe delivers pure bliss. Get ready to experience the ultimate rendition of this beloved bake – a Chocolate Chip Banana Bread that’s destined to become your new go-to.

The Ultimate Chocolate Chip Banana Bread Recipe
There are few things as comforting and universally loved as a warm slice of homemade banana bread. But when you add melty pockets of chocolate chips to that tender, moist crum extractb, you elevate it from a classic to an absolute masterpiece. This Chocolate Chip Banana Bread is my go-to recipe for a reason: it’s incredibly easy to make, uses simple ingredients, and delivers consistently delicious results. Whether you’re looking for a delightful breakfast treat, an afternoon pick-me-up, or a crowd-pleasing dessert, this recipe has you covered. The ripe bananas provide natural sweetness and moisture, while the brown and granulated sugars contribute to a perfectly balanced flavor and texture. The Greek yogurt adds an extra layer of tenderness and a subtle tang that complements the sweetness of the bananas and chocolate. And of course, the chocolate chips are the undisputed stars of the show, creating those irresistible gooey bursts with every bite.
Ingredients:
Instructions:
1.
Preheat and Prepare
Begin extract by preheating your oven to 350°F (175°C). Grease and flour a standard 9×5 inch loaf pan. You can also line it with parchment paper for easier removal, especially if you’re worried about sticking. The parchment paper should overhang the sides of the pan, creating “handles” that allow you to lift the bread out cleanly once it’s baked. This step is crucial for even baking and preventing the bottom and edges from burning.
2.
Combine Wet Ingredients
In a large mixing bowl, mash your ripe bananas thoroughly. The riper the bananas, the sweeter and more flavorful your bread will be, and the easier they are to mash. Look for bananas with plenty of brown spots – those are the best for baking! Add the packed light brown sugar and granulated sugar to the mashed bananas and mix until well combined. Then, pour in the melted unsalted butter and whisk until everything is incorporated. Next, crack in your two large eggs, one at a time, whisking well after each addition to ensure they are fully emulsified into the banana mixture. Stir in the vanilla extract and the Greek yogurt (or sour cream). The Greek yogurt adds a wonderful moistness and a slight tang that balances the sweetness beautifully. Give everything a good whisk until it forms a smooth, homogenous wet batter.
3.
Whisk Together Dry Ingredients
In a separate medium bowl, whisk together the all-purpose flour (or your chosen gluten-free blend), baking soda, and salt. Whisking the dry ingredients together ensures that the leavening agent (baking soda) and salt are evenly distributed throughout the flour, which is essential for consistent rise and flavor. This prevents pockets of salt or baking soda from affecting the texture or taste of your finished bread.
4.
Combine Wet and Dry and Add Chocolate Chips
Gradually add the dry ingredients to the wet ingredients, mixing with a spatula or wooden spoon until just combined. Be careful not to overmix; overmixing can develop the gluten in the flour too much, resulting in a tough loaf. A few streaks of flour are okay at this stage. Now, gently fold in 3/4 cup of the mini chocolate chips. Reserve a handful of the chocolate chips to sprinkle on top before baking. Folding them in at the end ensures they are evenly distributed throughout the batter without getting too broken down.
5.
Bake to Perfection
Pour the batter into the prepared loaf pan, spreading it evenly with your spatula. Sprinkle the reserved handful of mini chocolate chips over the top of the batter. This not only looks appealing but also ensures you get those delightful chocolatey bits right on the surface. Place the loaf pan in the preheated oven and bake for 50-65 minutes. The baking time can vary depending on your oven, so start checking for doneness around the 50-minute mark. The bread is ready when a wooden skewer or toothpick inserted into the center comes out clean, or with just a few moist crum extractbs attached (but no wet batter). If the top of the bread starts to brown too quickly before the center is cooked, you can loosely tent it with aluminum foil.
6.
Cool and Enjoy
Once baked, remove the loaf pan from the oven and let the banana bread cool in the pan for about 10-15 minutes. This allows it to set up slightly, making it easier to remove from the pan without breaking. Then, carefully invert the loaf onto a wire rack and let it cool completely before slicing. Cooling completely is key for the best texture and flavor, allowing the crum extractb to fully set and the flavors to meld. Slicing too early can result in a gummy texture. Once cooled, slice with a serrated knife and enjoy! This chocolate chip banana bread is delicious on its own, but it’s also fantastic served warm with a smear of butter.
Conclusion:
There you have it – a foolproof recipe for the most delicious Chocolate Chip Banana Bread you’ll ever bake! This recipe is a winner because it’s incredibly moist, bursting with sweet banana flavor, and perfectly complemented by generous pockets of melty chocolate chips. It’s the ultimate comfort bake, ideal for breakfast, a satisfying snack, or even a simple dessert. The aroma filling your kitchen as it bakes is simply non-intoxicating, and the taste is even better.
I love serving thick slices of this warm Chocolate Chip Banana Bread with a dollop of whipped cream or a smear of butter. It’s also fantastic toasted the next day. Don’t be afraid to get creative with variations! Consider adding a sprinkle of cinnamon or nutmeg for extra spice, or a handful of chopped walnuts or pecans for added texture. You could even drizzle it with a simple chocolate ganache for a more decadent treat.
I truly encourage you to give this recipe a try. It’s surprisingly easy and the results are always rewarding. You’ll be hooked!
Frequently Asked Questions:
Can I use frozen bananas?
Absolutely! Frozen bananas are actually ideal for banana bread because they are softer and sweeter, contributing to a more intense banana flavor and a wonderfully moist texture. Just make sure to thaw them completely and drain any excess liquid before mashing.
How long does this banana bread stay fresh?
Stored in an airtight container at room temperature, this Chocolate Chip Banana Bread will stay wonderfully fresh for about 2-3 days. For longer storage, you can refrigerate it for up to a week, or freeze it for up to 2-3 months. Simply thaw at room temperature.
My banana bread is too dense. What did I do wrong?
A common culprit for dense banana bread is overmixing the batter after adding the dry ingredients. Mix just until the flour is incorporated; a few lumps are perfectly fine. Also, ensure your leavening agents (baking soda and/or baking powder) are fresh. Overcrowding the oven with too many loaves can also affect even baking.
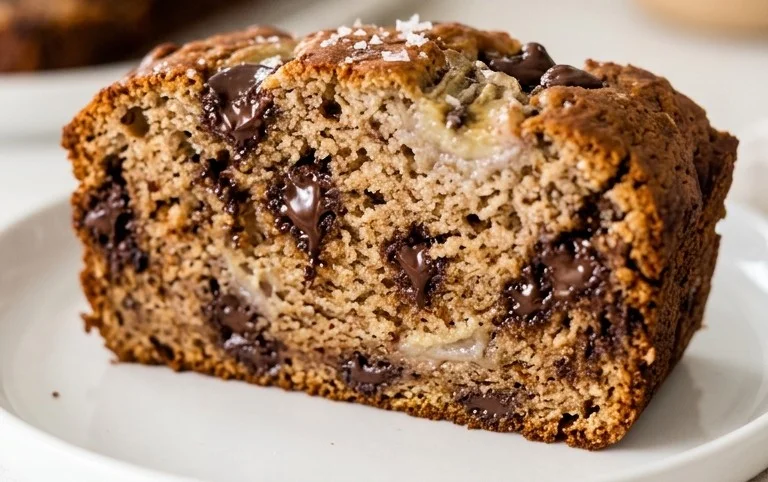
Chocolate Chip Banana Bread
Moist and delicious banana bread packed with chocolate chips, perfect for breakfast or dessert.
Ingredients
-
1 1/2 cups (380g) ripe and mashed banana (3-4 medium bananas)
-
1/2 cup (100g) packed light brown sugar
-
1/2 cup (100g) granulated sugar
-
1/2 cup (112g) unsalted butter, melted
-
2 large eggs
-
1 tsp vanilla extract
-
1/2 cup (120g) 2% Greek yogurt
-
1 1/3 cups (172g) all-purpose flour
-
1 tsp baking soda
-
1/2 tsp salt
-
3/4 cup (140g) mini chocolate chips
Instructions
-
Step 1
Preheat oven to 350°F (175°C). Grease and flour a 9×5 inch loaf pan. -
Step 2
In a large bowl, mash the ripe bananas. Add the brown sugar, granulated sugar, melted butter, eggs, vanilla extract, and Greek yogurt. Mix until well combined. -
Step 3
In a separate medium bowl, whisk together the flour, baking soda, and salt. -
Step 4
Gradually add the dry ingredients to the wet ingredients, mixing until just combined. Do not overmix. -
Step 5
Fold in the mini chocolate chips. -
Step 6
Pour the batter into the prepared loaf pan and sprinkle a few extra chocolate chips on top. -
Step 7
Bake for 50-65 minutes, or until a toothpick inserted into the center comes out clean. -
Step 8
Let the bread cool in the pan for 10-15 minutes before transferring it to a wire rack to cool completely.
Important Information
Nutrition Facts (Per Serving)
It is important to consider this information as approximate and not to use it as definitive health advice.
Allergy Information
Please check ingredients for potential allergens and consult a health professional if in doubt.